Creating Basic Schedules
Summary
This document addresses work instructions for how to create basic schedules.
Using schedules is a great way for a supervisor to track non-critical issues such as tardies, leaving early or missed days and critical issues like missing punches. A calendar schedule is generally used when there may be inconsistencies to an employee’s schedule day to day or week to week. Schedules can be added from the employee’s time card or their schedule tab.
Adding a Schedule From the Time Card
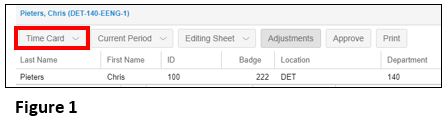
1. Select the employee and the Time Card tab (Figure 1).
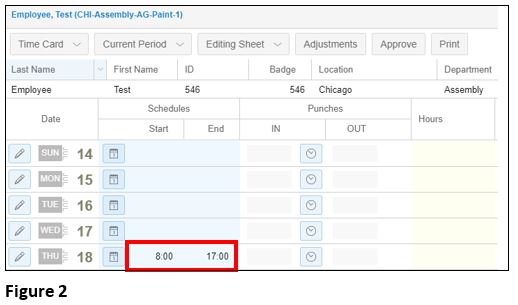
2. On the date you wish to create the schedule, click in the open area under the Schedule column (Figure 2).
3. Enter the start time with am or pm and hit Enter.
4. Both the start time and an estimated end time will populate; to change the end time, click on the time and type in a new time.
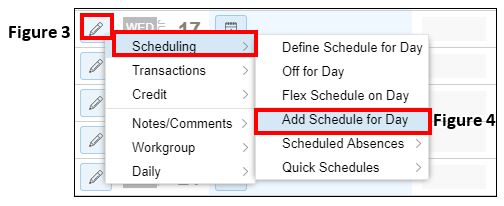
5. A schedule may also be added by clicking on the pencil icon on the respective date (Figure 3).
6. Click on Scheduling and Add a New Schedule (Figure 4) and the Add Schedule box will open (Figure 5).
Please Note: Adding a one-time schedule using this method may be preferred if the employee will be working outside of their home work group.

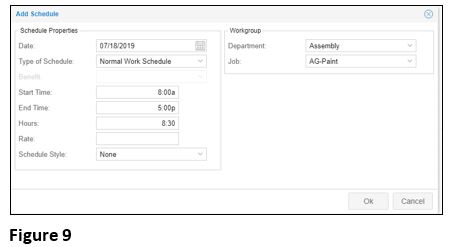
Date: Verify the date of the schedule is correct.
Schedule Type: Select the proper schedule from the dropdown.
*Normal Work Schedule: Basic schedule type used most often
*Flex Schedule: Used when the specific hours are not important, but the tracking of hours are.
*Absence Planned Schedule: Used for pre-approved benefit usage, like FMLA.
Start/End Time: Enter in the start and end time of the scheduled shift.
Amount: Enter in the amount of hour for the scheduled shift; add time for lunch break if necessary.
Rate: It is possible to change the rate of pay for a specific schedule. Please note that rate of pay triggers would need to be set up for this change to work.
Department and Job: This will default to the employee’s home workgroup; however, you may choose to have the employee work somewhere else. Make the appropriate changes. Please note that when changing either Dept or Cost Center, the schedule will reflect the change on the employees Schedule tab. It will also show on the managers schedule calendar in blue.
7. Click OK and the one-time schedule will be created.
Adding Schedules From the Schedules Tab
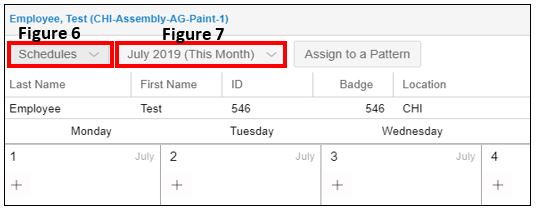
1. Select the Schedules tab (Figure 5) from the employee’s menu.
2. To change the month, click on dropdown arrow and adjust appropriately (Figure 6).
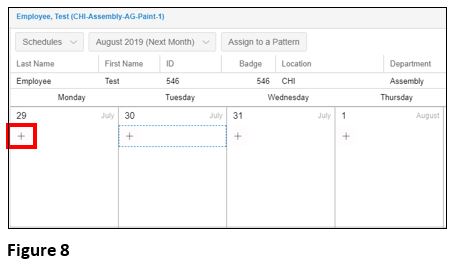
3. Click on the ‘+’ (Figure 8) on the calendar date you wish to enter the schedule and then Add Work Schedule. The Add Schedule box (Figure 9) will open.
4. Enter the appropriate information for the schedule as outlined above and click OK for the schedule to be created.
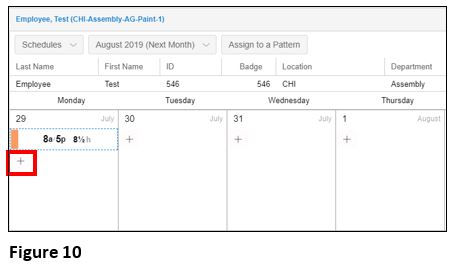
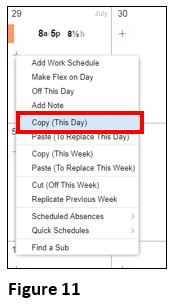
5. To repeat the schedule on a different day you may either repeat the steps above for each individual day or click the ‘+’ on the calendar cell of the schedule you just created (Figure 10). Home workgroup schedules will show in black and out-of-workgroup schedules will show in blue.
6. From the menu, select Copy (Figure 11).
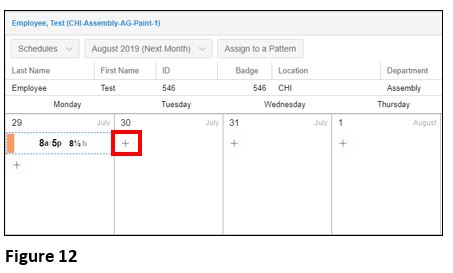
7. To paste the schedule to a different day, click the ‘+’ on the calendar (Figure 12).
8. From the menu, select Paste (To Replace This Day) (Figure 13) and the schedule will appear on the calendar.

9. Repeat these steps to fill out the rest of the week (Figure 14).

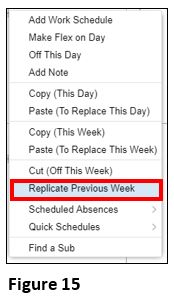
10. A week’s schedule may be repeated to the next week. Click on the ‘+’ at the start of the next week and from the menu select Replicate Previous Week (Figure 15).
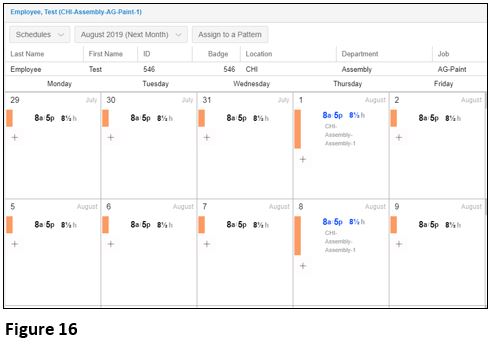
The two week work schedule has now been added to both the calendar (Figure 16) and the employee’s timecard.
Modifying/Cancel a Schedule
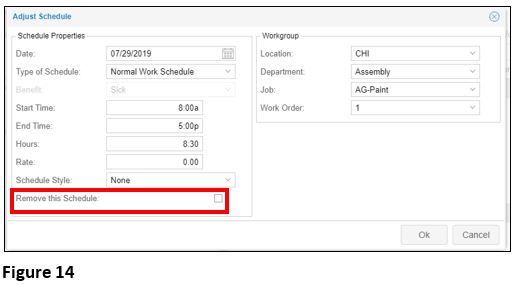
1. From the Schedules Tab and the appropriate date, click on the schedule time and the Adjust Schedule box will open (Figure 15).
2. Make the appropriate changes and select OK to make the change. To delete a schedule, check the Remove this Schedule box (Figure 16) and select OK.