How to Configure Workgroups
Summary:
This document addresses how to configure workgroups in the manager portal.
Configure Workgroups
Workgroups often correspond to the organizational structure of your business and can be used for labor and cost tracking. An area of responsibility or a unit with a labor budget is defined as a workgroup. For example, Department is a common workgroup. Workgroups can represent positions or jobs within an organization (e.g.-Front Desk).
An example of a Workgroup structure may be Location, Department & Job. The following diagram displays a 3 level workgroup structure.
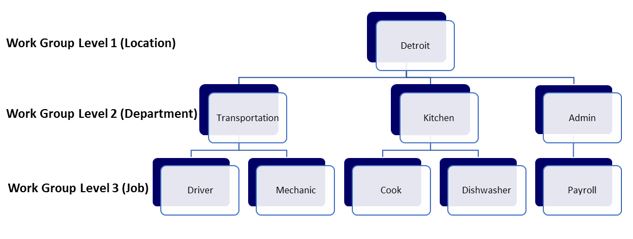
Each employee will be assigned to a workgroup combination which is considered their Home Workgroup. Reporting of your employees’ hours and benefits can be done by the workgroup combination or by a specific workgroup level.
Workgroup Setup
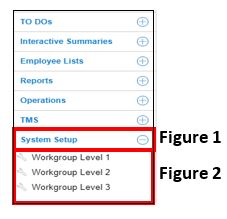
1. From the Manager Portal Menu, select System Setup (Figure 1) and the workgroup levels will display (Figure 2).
They are typically defined as:
1. Workgroup Level 1 (Locations)
2. Workgroup Level 2 (Departments)
3. Workgroup 3 (Jobs)
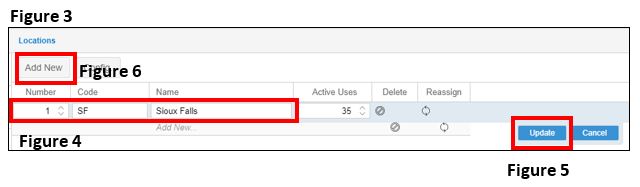
2. Click on Workgroup Level 1 to set up your Locations and the setup menu will appear (Figure 3).
3. Click the cell in any column to edit the workgroup (Figure 4) and type in:
a. The Location Code (example: SF for Sioux Falls)
b. The Name of the Location
*Active Uses is the amount of employees tied to the location and will automatically set. Do not enter anything in this cell.
4. Select “Update” to Save (Figure 5).
5. To add another Location, select Add New (Figure 6) and repeat the steps.
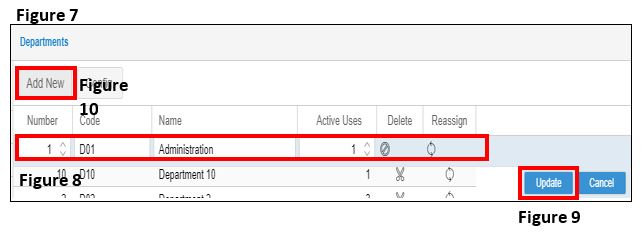
6. Click on Workgroup Level 2 to set up your Departments and the setup menu will appear (Figure 7).
7. Click the cell in any column to edit the workgroup (Figure 8) and type in:
a. The Number of your Department
b. The Location Code
c. The Name of the Department
*Active Uses is the amount of employees tied to the location and will automatically set. Do not enter anything in this cell.
8. Select “Update” to Save (Figure 9).
9. To add another Department, select Add New (Figure 10) and repeat the steps.
*Columns may be sorted by the header by clicking on them.
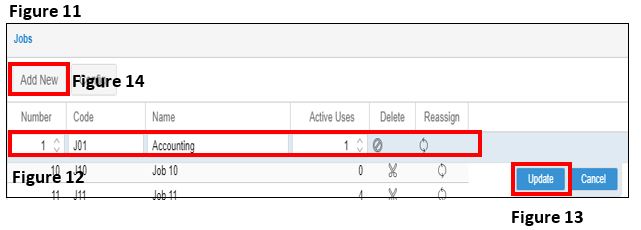
10. Click on Workgroup Level 3 to set up your Jobs and the setup menu will appear (Figure 11).
11. Click the cell in any column to edit the workgroup (Figure 12) and type in:
a. The Number of your Location
b. The Location Code
c. The Name of the Job
*Active Uses is the amount of employees tied to the location and will automatically set. Do not enter anything in this cell.
12. Select “Update” to Save (Figure 13).
13. To add another Job, select Add New (Figure 14) and repeat the steps.
*Columns may be sorted by the header by clicking on them.