How to Approve a Time Card
Summary
This document addresses work instructions for where and how to approve a timecard.
Lock time card operation is included in the Approved Time Card operation. Locking a time card allows a manager to secure a time card to prevent employees from editing the time card. Approving a time card allows a supervisor to verify that the information in the time card has been reviewed and the time period is ready to be closed
To Approve a Timecard from the Employee Timecard
Individual timecards can be approved directly from the employee’s timecard.
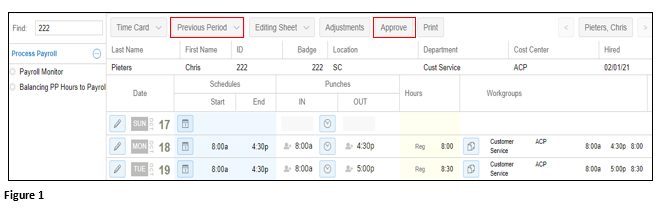
1. From the employee’s timecard change the pay period to Previous Period and click the Approve button (Figure 1).
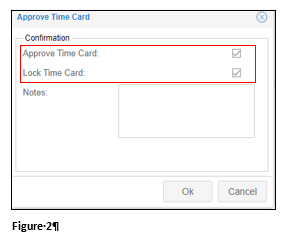
2. The Approve Time Card window will appear. Check the Approve Time Card box and Lock Time Card box. Click OK to approve the time card (Figure 2). Note: Notes may also be entered in the Notes textbox. Notes will appear on the timecard, unless hidden with Preferences. Notes may also be printed out by a created a custom report.
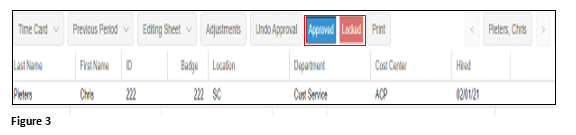
3. The employee’s timecard will display Approved and Locked (Figure 3).
To Approve a Timecard from News Items
Individual timecards can be approved from the News Items area on the Dashboard menu item.
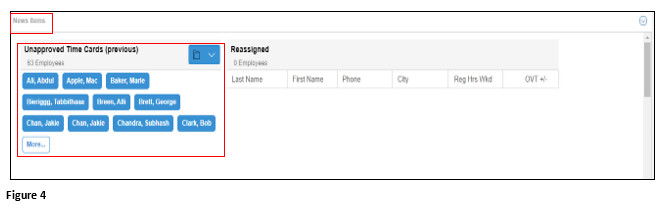
1. From the Dashboard menu item, open News Items to display the Unapproved Time Cards (previous) (Figure 4).
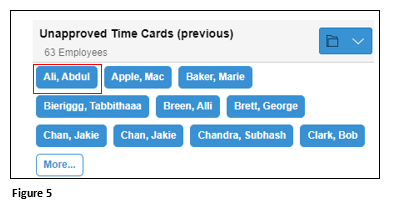
2. Click on the employee’s name and the supervisor will be taken to the employee’s timecard (Figure 5).
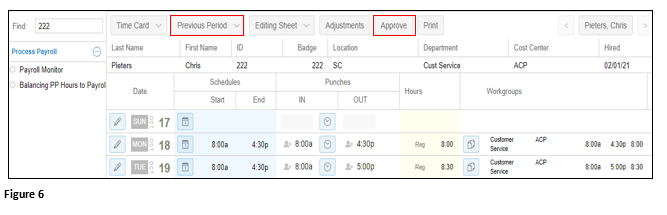
3. From the employee’s timecard verify the pay period is Previous Period and click the Approve button (Figure 6).
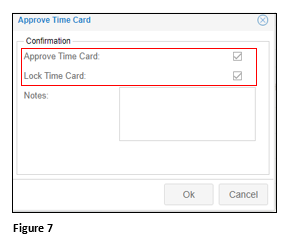
4. The Approve TimeCard window will appear. Check the Approve TimeCard box and Lock TimeCard box. Click OK to approve the timecard (Figure 7). Note: Notes may also be entered in the Notes textbox. Notes will appear on the timecard, unless hidden with Preferences. Notes may also be printed out by a created a custom report.
5. The employee’s timecard will display Approved and Locked. The supervisor may cycle through the rest of the timecards by using the arrow keys (Figure 8).
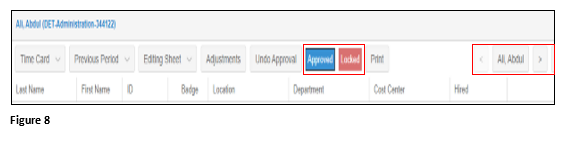
6. Once moving to the next timecard, the supervisor may click Approve & >. This will lock and approve the current timecard and cycle to the next (Figure 9).

To Approve Timecard Using Group Adjustments
Multiple timecards can be approved using Group Adjustment
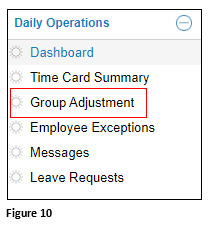
1. From the quick menu, find Group Adjustment (Figure 10). Please note: Group Adjustment may be found under different menu headers depending on the Manager Portal setup.
2. Click Change Type of Adjustment and select Authorize Period Time Card from the Group Adjustments menu (Figure 11).

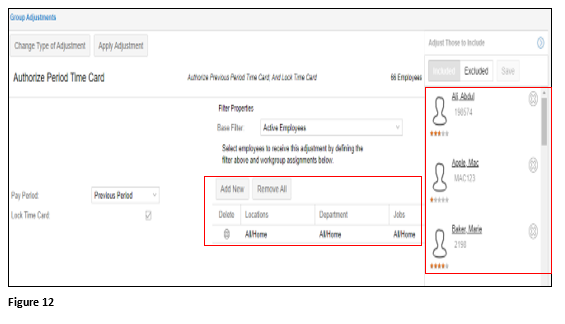
3. The supervisor may filter workgroups and/or employees from the list (Figure 12).
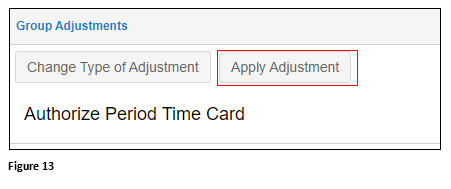
4. Once the filters have been applied, click Apply Adjustment (Figure 13).
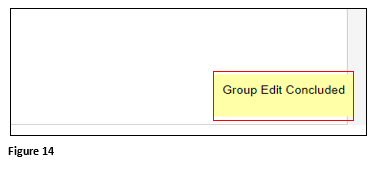
5. The process will run and will display a message when complete (Figure 14).