How to Setup Schedule Patterns
Summary
This document addresses work instructions for how to set up schedule patterns.
Schedule Patterns
Schedule patterns automate the creation of specific schedules for employees. Once created the pattern reapplies the schedules automatically into the future. Schedule patterns are useful for employees with repetitive work schedules such as a set number of days per week and set hours per day (e.g. Monday through Friday 8 a.m. to 5 p.m.).
Schedule patterns can be weekly, biweekly, or a custom number of days. For example, if many employees work 9:00AM – 6:00PM Monday and Tuesday, but 8:30AM - 5:30PM Wednesday - Friday, you can assign all of those employees to the same schedule pattern. Employees do not even have to be in the same workgroup.
Create a Schedule Pattern
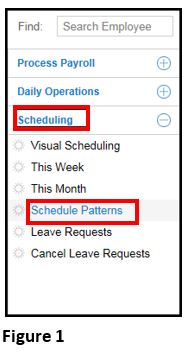
Schedule patterns are viewable and added from the Schedule Patterns menu item in the Scheduling menu located in the left panel (Figure 1).
Create a Schedule Pattern
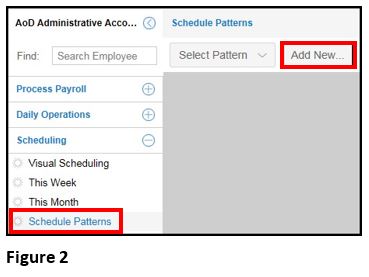
1. Click Schedule Patterns in the scheduling menu and Add New button on the Schedule Patterns page (Figure 2).
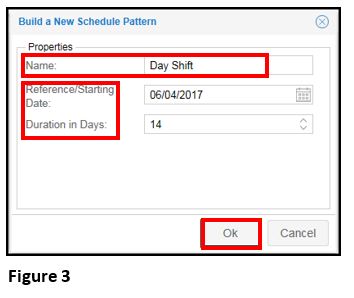
2. In the Build New Schedule Pattern window, you can create a new schedule pattern using the following steps (Figure 3):
- Create the schedule pattern properties
- Specify the hours per day for the schedule pattern
- Assign employees to the schedule pattern
- Apply the schedule pattern to the employees
3. Create a Name for the schedule pattern.
4. Enter a Reference/Starting Date for the pattern.
5. Select the Duration in Days for the pattern (i.e. 7 days, 14, etc.).
6. Click Ok.
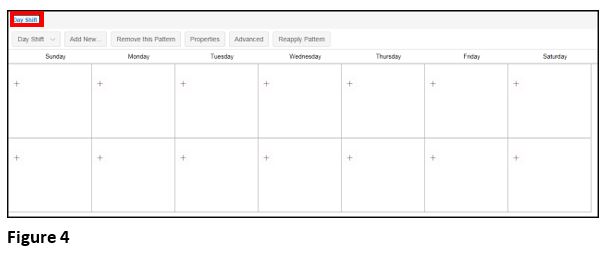
7. The newly created schedule pattern displays. It will be a blank schedule of the pre-determined length (Figure 4).
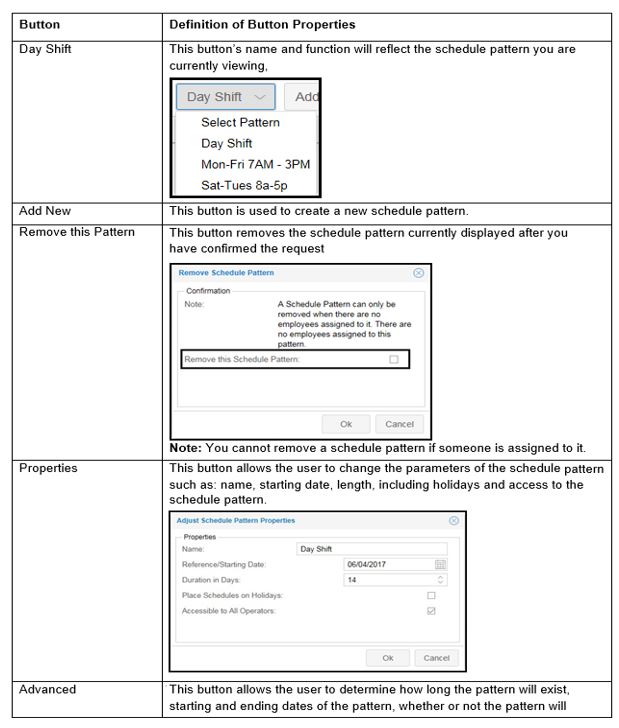
Schedule Pattern Properties
There are several buttons that are associated with further defining the schedule pattern. We will take a look at those now. The table below provides an overview of the functions of each of these buttons.
Defining a Schedule in a Schedule Pattern
To define a schedule within a schedule pattern, the schedule properties must be added.
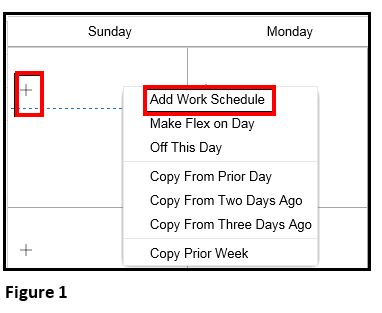
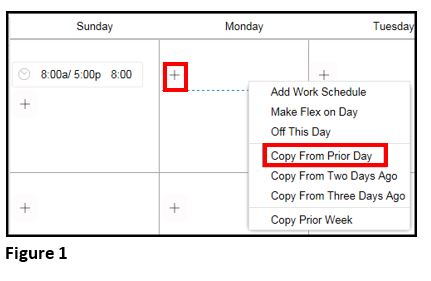
1. Click the Plus icon in the first date of the selected schedule pattern and select a menu item (Add Work Schedule, Make Flex on Day or Off This Day) (Figure 1).
3. Select Type of Schedule, Start and End time, and click Ok (Figure 2).
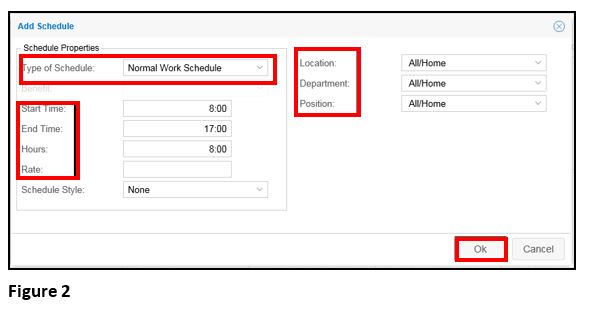
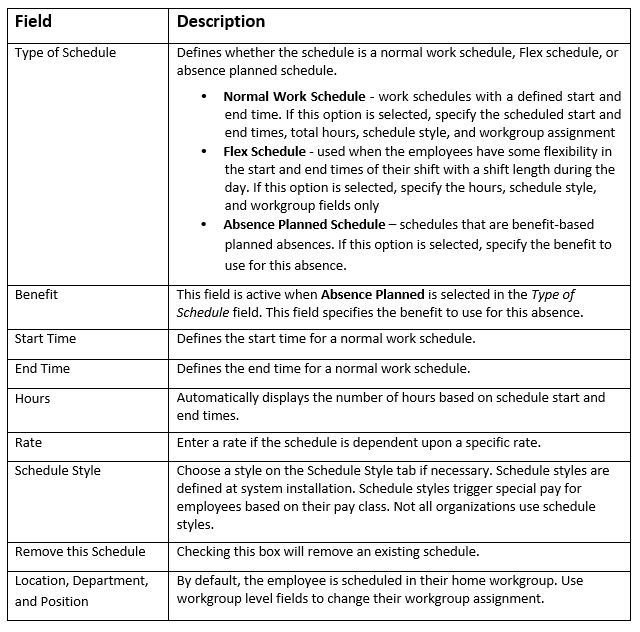
The table below defines each field in the Add Schedule window.
Copying a Schedule from One Day to Another
Rather than having to individually re-enter all of the information from one day to the next using the previously described process, schedules can be copied from one day to the next.
1. Click the Plus icon on the date to be scheduled .
2. Select Copy From Prior Day (Figure 1).
3. The schedule is copied and placed automatically on the new date (Figure 2).
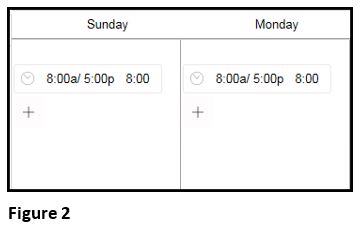
Note: If there are variations within the schedule (not all days have the same schedule) you have the option of copying from the previous two or three day or previous week’s schedule.
Removing a Schedule Pattern
To remove a schedule pattern that is obsolete or no longer used, the Remove This Pattern button is used.
1. Click the Remove this Pattern button (Figure 1).
2. Check the Remove this Schedule Pattern check box.
3. Click Ok (Figure 2).

Adjust Schedule Pattern Properties
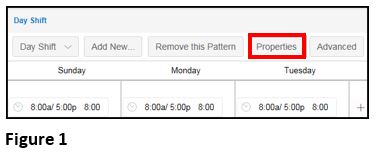
To make adjustments to the schedule pattern properties, use the Properties and Advanced buttons. For simple adjustments the Properties button is used.
1. Click the Properties button (Figure 1).
2. Make adjustments in the Adjust Schedule Pattern Properties window.
3. Click Ok (Figure 2).
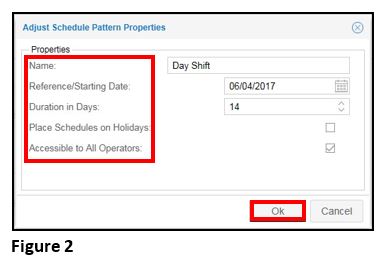
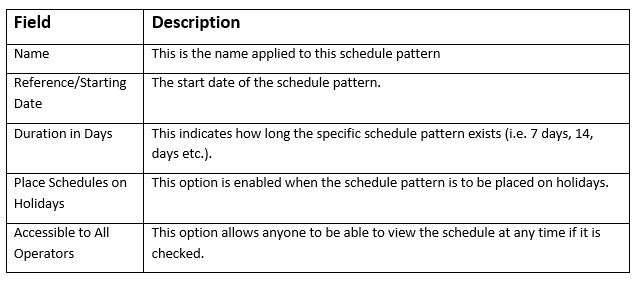
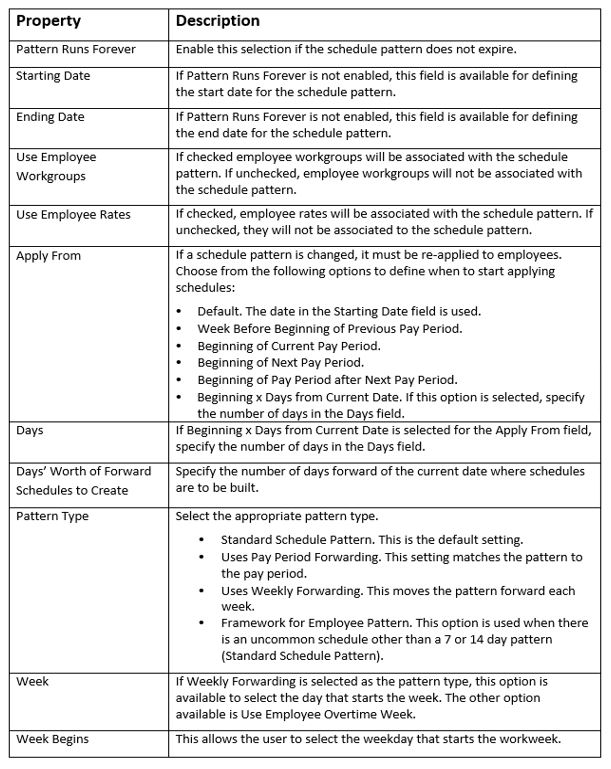
The following table describes the fields available in the Adjust Schedule Pattern Properties window.
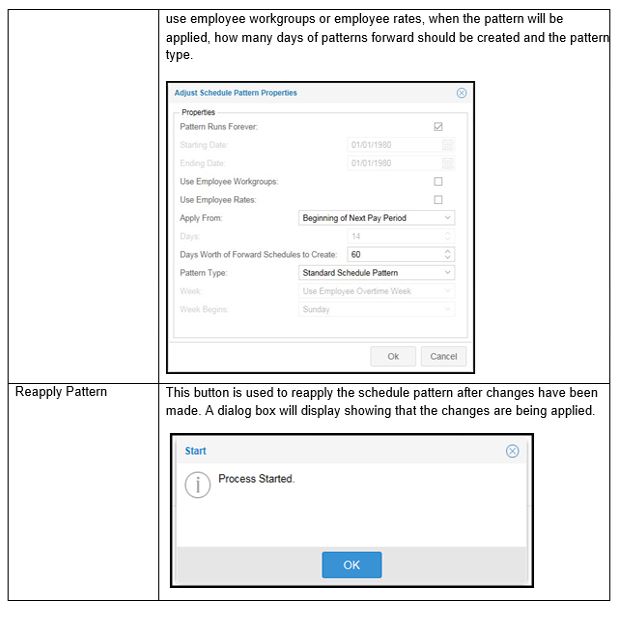
Advanced Options
The advanced options further define specific properties associated with a schedule pattern such as how long the pattern will run, how many schedules forward will be created, and pattern type to name some of the options available.
1. Click the Advanced button .
2. Select the preferred options in the Adjust Schedule Pattern Properties window.
3. Click Ok (Figure 1).
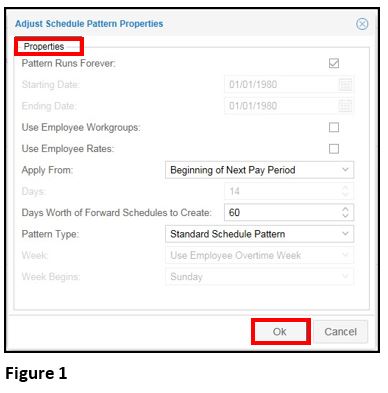
Note: The window will display with default settings. Some areas will be greyed out as a result.
The Table below describes the purpose of each field in the Adjust Schedule Pattern Properties window.
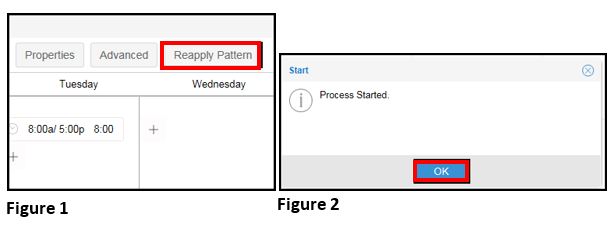
Reapply Pattern
When any change is made to an existing schedule pattern, it must be re-applied so that the changes are reflected in any current schedule pattern in use.
1. Click the Reapply Pattern button (Figure 1).
2. Click Ok in the Process Started window (Figure 2).
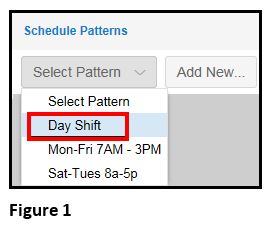
Assigning Employees to Schedule Pattern
After creating a schedule pattern, assign employees to the schedule using the following steps:
1. Select the Schedule Pattern from the Schedule Pattern menu (Figure 1).
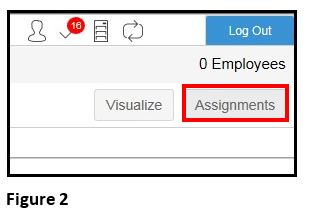
2. Click the Assignments button (Figure 2).
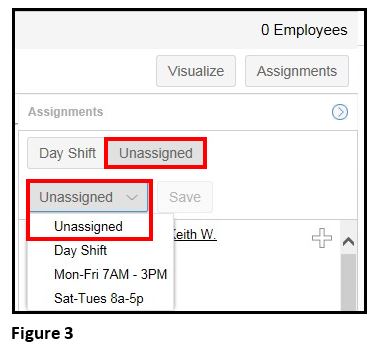
3. Click the Unassigned button or select Unassigned from the drop-down menu to access employees who do not have a schedule assigned to them (Figure 3).
The list of unassigned employees displays in the right panel.
4. Click the Plus icon to select the employee you wish to add to the schedule.
5. Add appears in place of the plus icon. Select all employees you wish to add to the schedule.
6. Click the Save button (Figure 4).

Note: Add is not a button. It merely indicates that you have selected that employee to add to the schedule. To save your selection, you have to click the Save button.
Note: If you have selected an employee to add to the schedule, but decide not to use that employee, simply de-select by using the arrow above the Add box.
Once you have saved your selections, a window displays to confirm the selections made.
7. Check the Confirm this Operation box.
8. Click Ok (Figure 5).
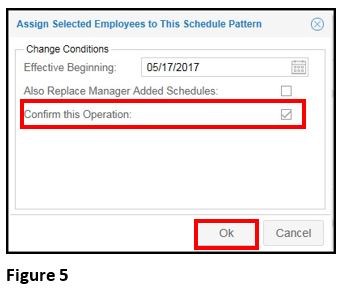
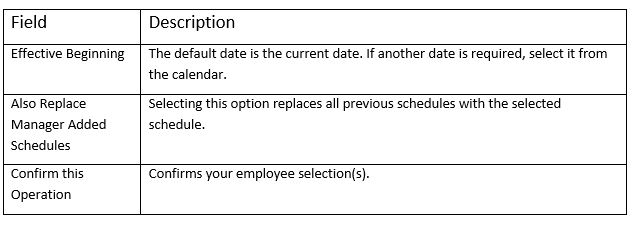
.The table below describes the properties of fields in Figure 5.
Assigning/Reassigning an Employee’s Schedule Pattern
Sometimes, when an employee is assigned to a schedule pattern for a period of time and a change to their pattern needs to be made, it can be done from their personal schedule page. To do so:
1. Navigate to the individual’s schedule page.
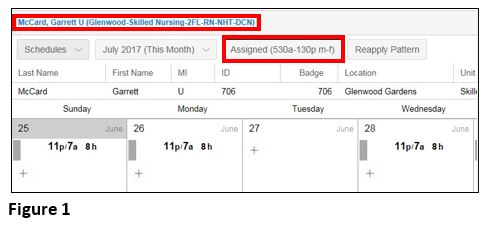
2. Click the Assigned button (Figure 1).
Note: The assigned button will also display the current schedule pattern assigned to the employee.
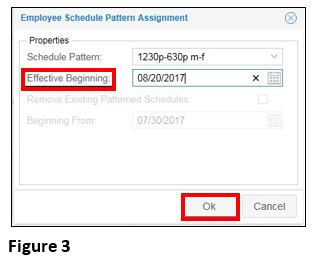
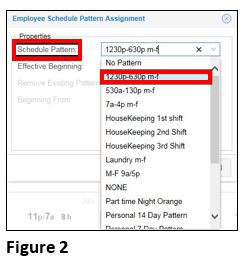
The Employee Schedule Pattern Assignment window displays.
3. Select the new Schedule Pattern for the employee from the drop-down menu (Figure 2).
4. Enter the Effective beginning date.
5. Click Ok (Figure 3).