How to View and Edit the Time Card Body
Summary
This document addresses work instructions for how to view and edit the time card body.
Time Card Body
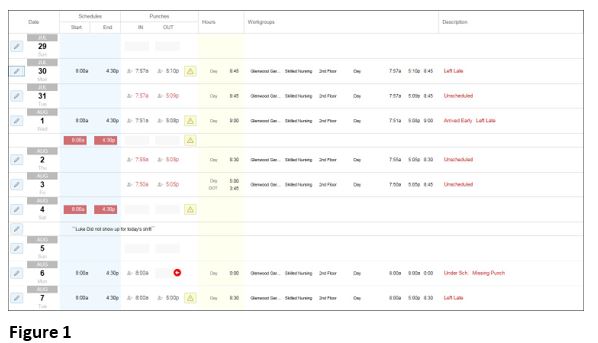
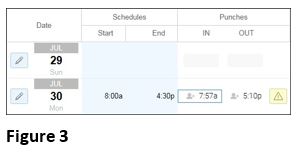
Beneath the header information is the time card body where all time card editing is done (Figure 1).
Column Width, Sorting, Show and Remove
Users can modify each column’s width, sorting method, and also show or remove the column from the display.
Column width
The column width may be adjusted temporarily. To adjust the column width:
1. Align the cursor of the column’s edge (Figure 1).
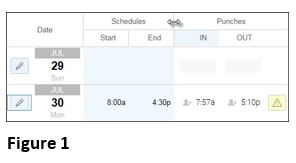
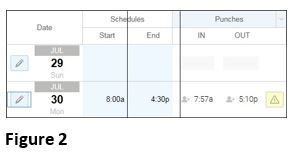
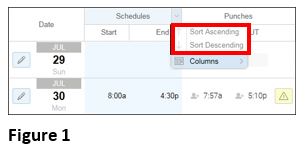
2. Drag the cursor to the new size (Figure 2).
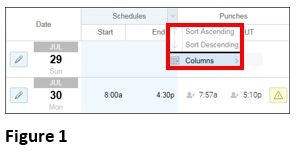
3. Release the cursor (Figure 3).
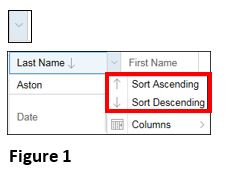
Sorting
Some columns may be sorted using Sort Ascending or Sort Descending. To sort a column:
1. Click on the arrow at the end of the column. A fly out menu will appear (Figure 1).
2. Select the Sort Ascending or Sort Descending option.
Note: The column contents will be organized alphabetically or numerically ascending or descending.
Show columns
Columns may be displayed or hidden. To show a column:
1. Click on the arrow at the end of the column. A fly out menu will appear (Figure 1).
2. Select the Columns option. A fly out menu will appear (Figure 2).
3. Check the box next to all columns you wish to view.
Hide columns
To hide a column:
1. Click on the arrow at the end of the column. A fly out menu will appear (Figure 1).
2. Select the Columns option. A fly out menu will appear (Figure 2).
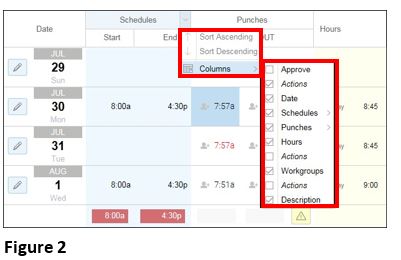
3. Uncheck the box next to all columns you do not wish to view.
Column properties:
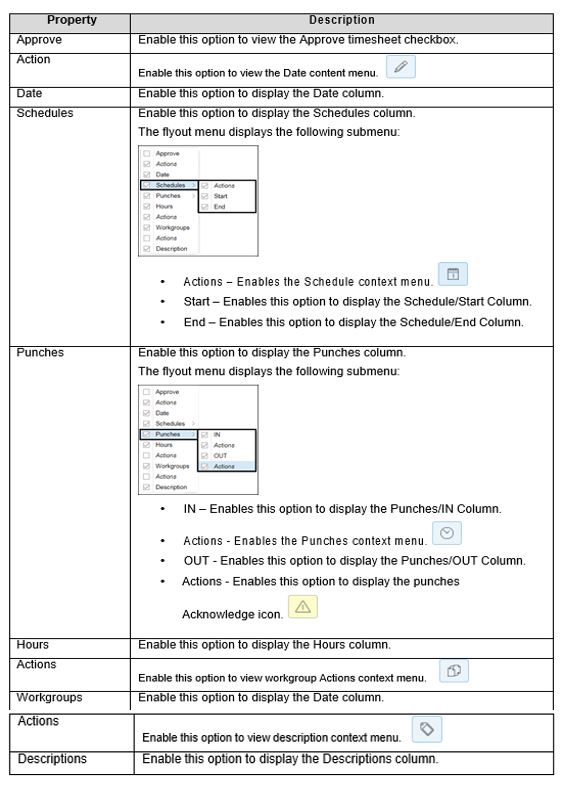
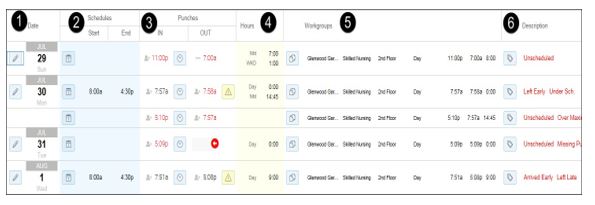
1. Date Column
In the Date column, managers can click on the context menu to manipulate the schedule for that date, make adjustments, like adding a punch, credit or debit hours, or adding incidents. They can also manage where the employee is working for the day, add notes to the time card, and review the employee’s earning-related information.
2. Schedule Column
The Schedule column displays the employee schedule and allows the manager to click, add a new schedule, edit the schedule, or delete the schedule.
3. Punches Column
The Punches column is where the manager manipulates the employee punch activity, either by clicking in an empty cell, and entering an In or Out punch, or by clicking an existing punch to remove or alter it.
4. Hours Column
The Hours column displays the total hours for the shift.
5. Workgroup Column
The Workgroup column displays the employee’s workgroup information and is where the manager can adjust workgroup allocations.
6. Description Column
The Description column displays exceptions and allows the manager to acknowledge exceptions present.
Details Section
Beneath the time card section is the Details section (Figure 1).

Once expanded the Details section displays configured time card data sections. In this database, the period total summary, daily summary, adjustments/editing summary, and employee benefit summary, notifications, triggers, GPS registration, work distance rules, leave request and employee messages are displayed.
The detail section is configurable to client specifications.
To View Details Panel:
1. Click the Up Arrow to expand the Details panel at the bottom of the Time Card page to view detailed information on the following tabs (Figure 1).

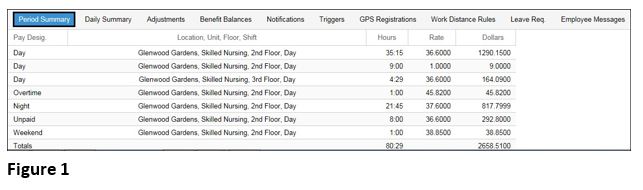
Period Summary
The Period Summary tab displays total pay designation hours and dollars earned by the employee during the selected pay period (Figure 1).
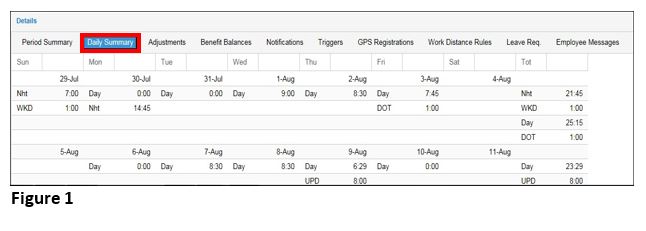
Daily Summary
The Daily Summary tab displays a calendar view of pay designation hours by day, for the pay period (Figure 1).
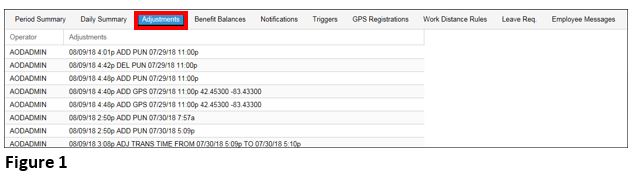
Adjustments
The Adjustments tab displays supervisor adjustments made to the time card, listed by the operator who made the adjustment and the date, time, and type of adjustment made (Figure 1).
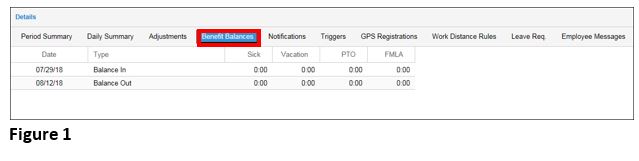
Benefit Balances
The Benefit Balances tab displays beginning and ending balance for the pay period (Figure 1).
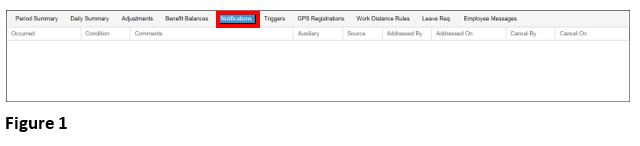
Notifications
The Notifications tab displays notifications sent to the employee (Figure 1).
Note: Notifications can be configured differently for two notification types: Leave Requests and Attendance Notifications (namely Time Card Triggers).
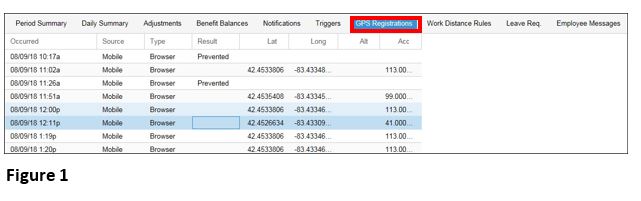
GPS Registrations
The GPS Registrations tab works with ESS Mobile, in that the employee uses ESS Mobile to punch, and then the coordinates of the employee’s location at the time of punch displays on the GPS Registrations tab in Manager Portal (Figure 1).
Note: When “Prevented” appears in GPS registration, this means the employee turned off location services on their phone.