How to Process Payroll in tmsPay
Summary
This document outlines how to process payroll in tmsPay.
To Process Payroll
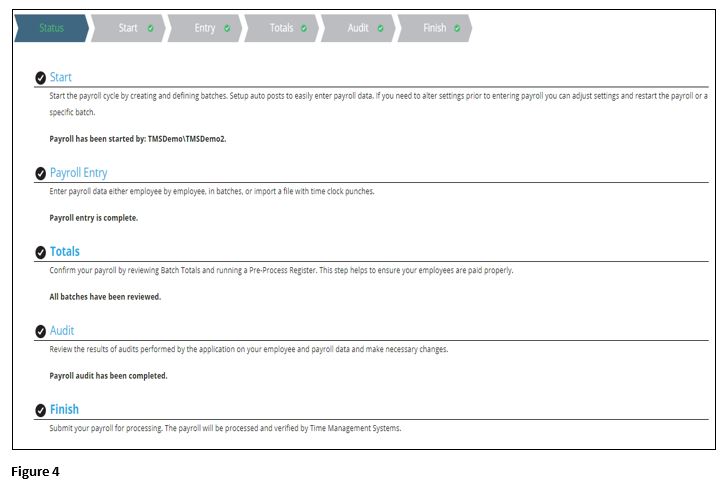
1. From the tmsConneXion menu, select tmsPay and MyTeam (Figure 1).
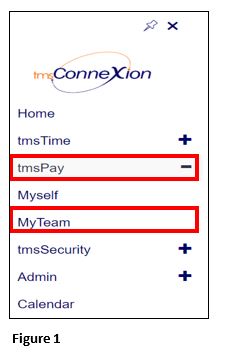
2. Log in with the User Name, Password and Company ID (Figure 2).
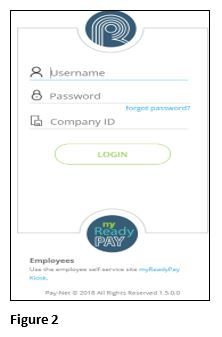
3. From the Home screen, select Run Payroll and you will be taken to the Payroll tab (Figure 3).
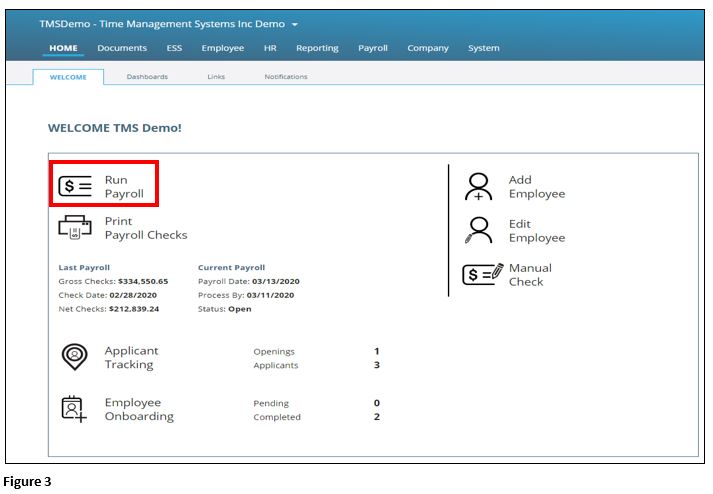
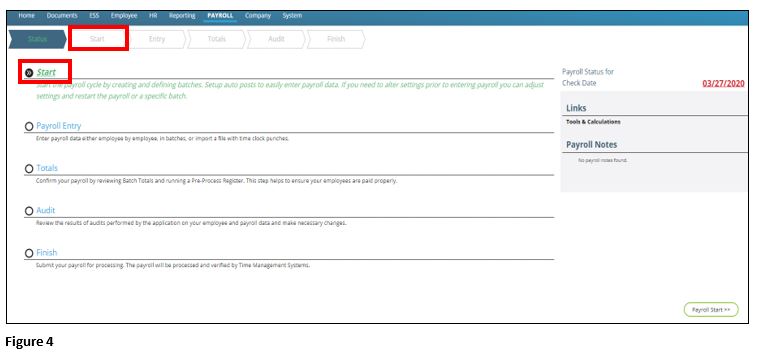
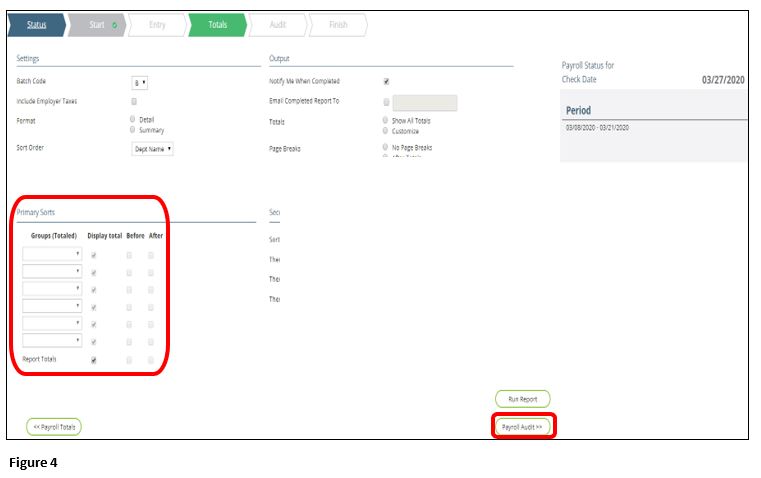
4. This will take you to the “status” screen which shows you the overview of all the steps needed to process payroll. Select the Start button to proceed (Figure 4).
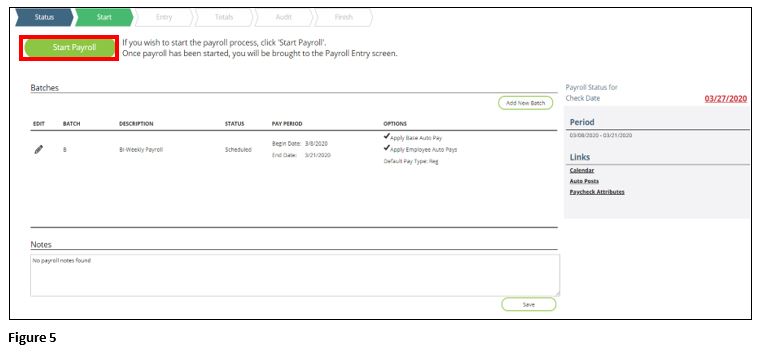
5. The start screen shows you the pay period begin and end date and which batch you are processing (IE: weekly, semi-monthly, or bonus). Please double check all of the components. You have the ability to update the pay period if need be by clicking on the red date (if it effects future calendars or you need to change frequencies please e-mail into operations with an updated calendar). If you need a check date change, please contact TMS. If everything looks okay, please click on the Start Payroll button (Figure 5).
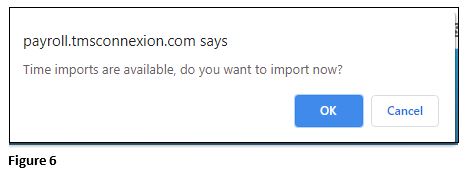
6. After selecting start, a pop up will appear asking if you are sure you want to start payroll, select OK (Figure 6).
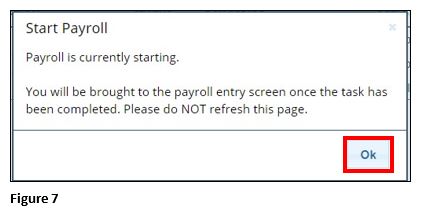
7. An additional pop up will appear warning that it is going to take you to the payroll entry screen; click OK (Figure 7).
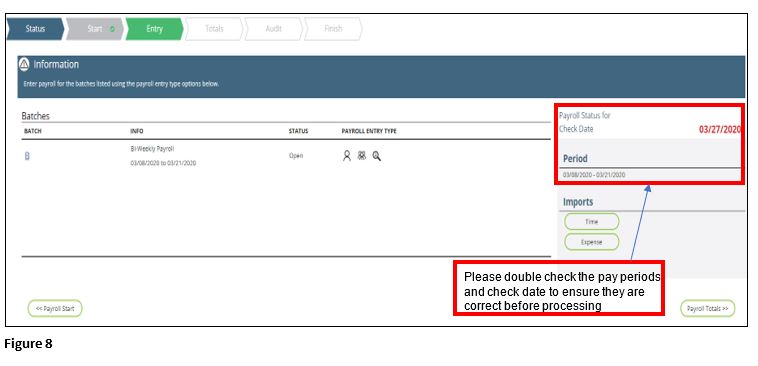
8. The start screen will look like this after selecting start (Figure 8).
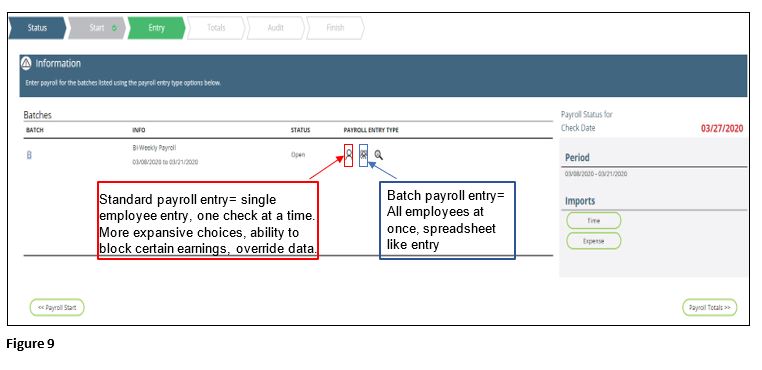
9. In the payroll entry screen, you will see a few selections for entry. Standard Payroll Entry or Batch entry (Figure 9).
a). Standard payroll is one select employee at a time.
b). Batch entry is all the employees at once.
Standard Payroll Entry
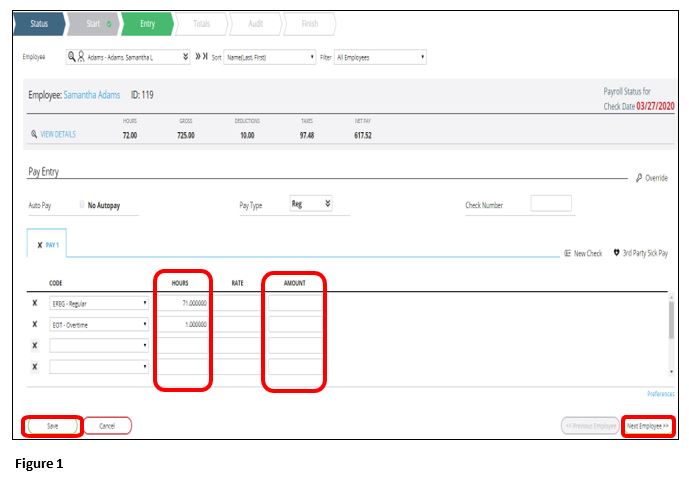
1. To enter the payroll in standard, utilize the hours and amount columns. You can also type in a rate if it is different than their base rate. If you need to change the base rate permanently please do so under the payroll data tab (Figure 1).
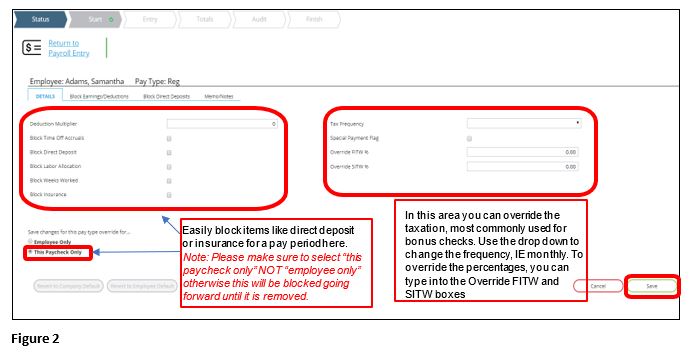
2. There are a few sections that you can utilize as well in this screen that are more advanced than batch entry (Figure 2). See the following instructions to make changes.
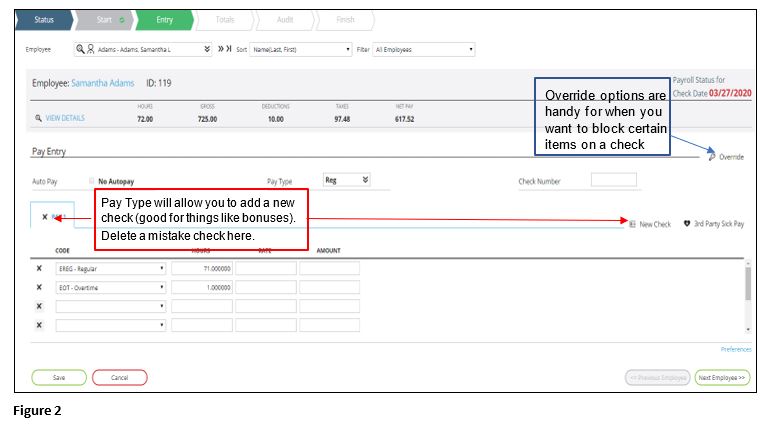
A). Select Override where you can select anything you would like to block or override temporarily for this pay period. (Figure 2).
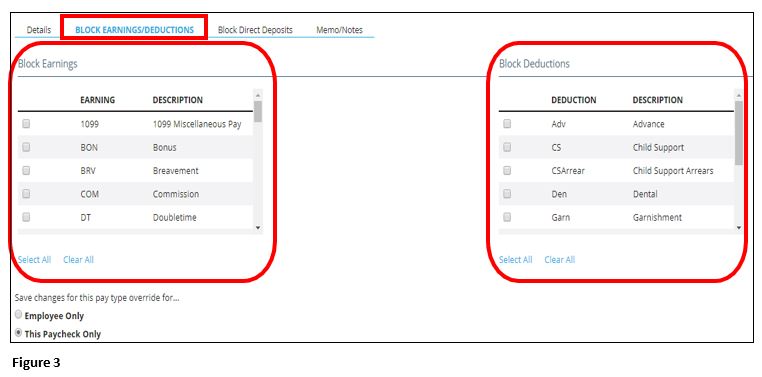
B). The second tab under override options gives you the ability to block select earnings or deductions. IE: Blocking a per pay period bonus or garnishment for a check date (Figure 3).
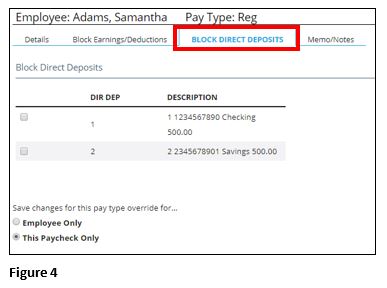
C). ). In the “Block direct deposit” box, select the check mark next to the active direct deposit you wish to block for the employee if there is one set up (Figure 4). Note: If this is a permanent change to the employee please make the change in the payroll data screen, under the direct deposits
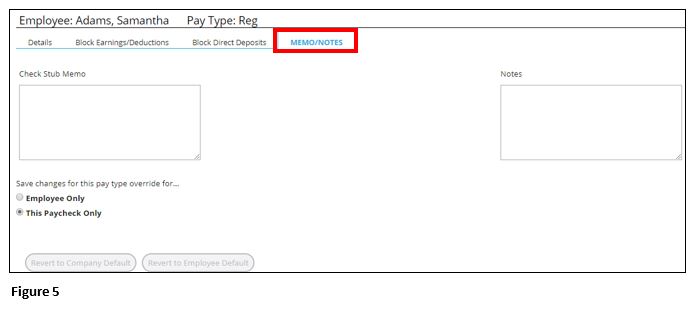
D). Area to make note on the employee’s check. IE: “Happy Holidays” for a bonus check, or “Final check” for a termination (Figure 5).
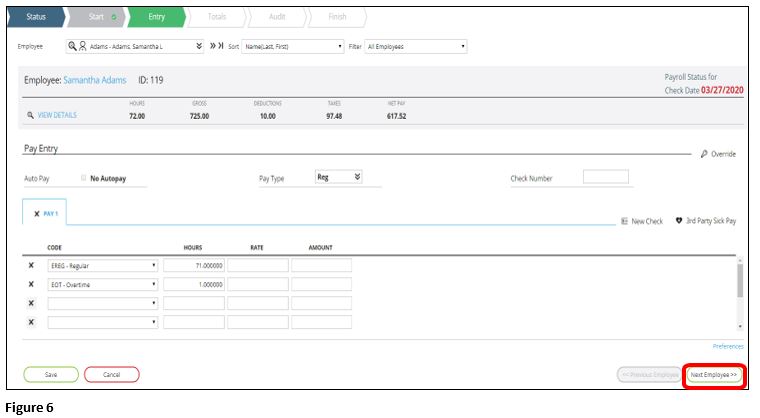
3. After entering your employee’s hours and saving you can select “next employee” to move to the next employee entry (Figure 6).
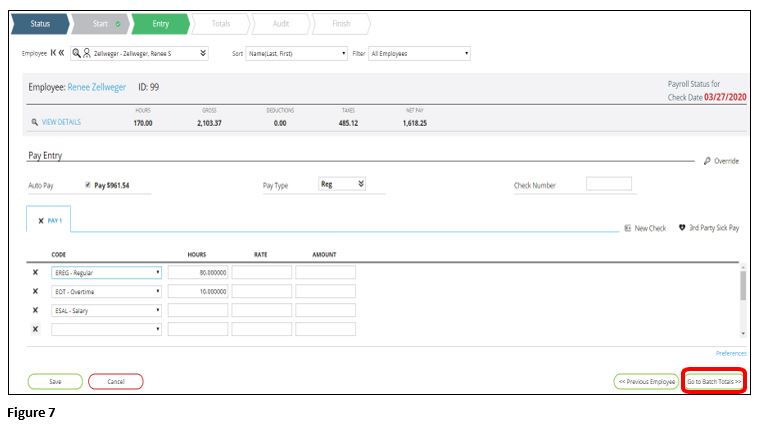
4. Once you have reached the end of your employees, the “next employee” box will be gone and a new button will appear asking you to “Go to Payroll Batches”. This will take you back to the entry screen, and you will then go to the auditing stage (Figure 7).
Batch Payroll Entry
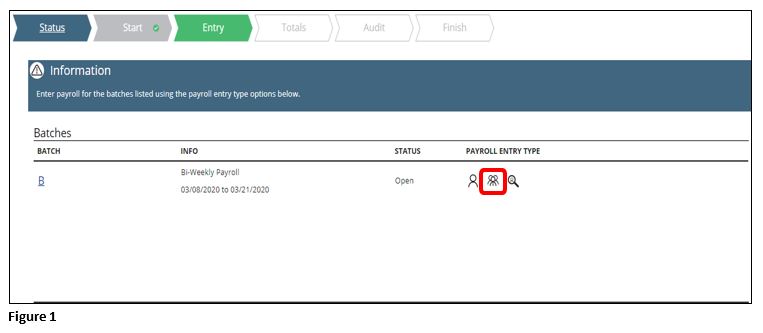
1. If you would prefer to enter all of your employees at one time, you can utilize the batch entry. Select the Batch icon (Figure 1).
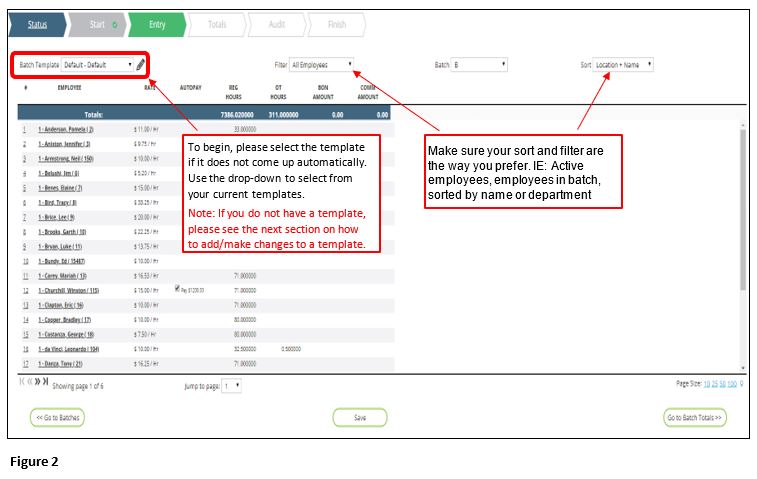
2. Select the proper Batch Template; see the next section if you do not have a template (Figure 2).
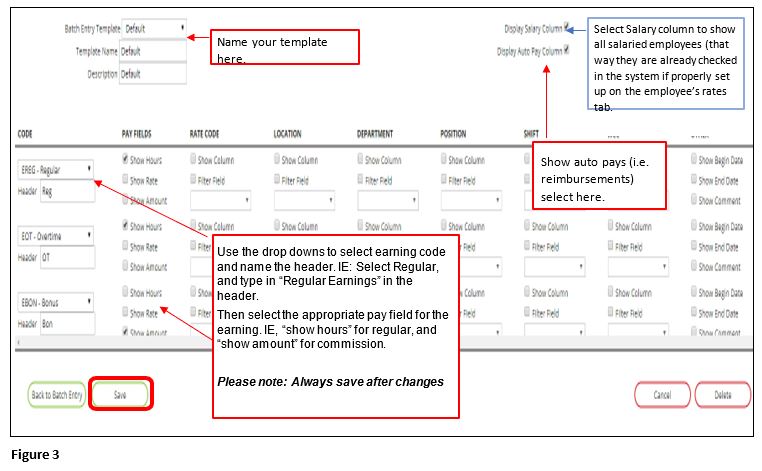
3. Select the pencil on the batch template screen to enter the batch entry setup screen (Figure 3).
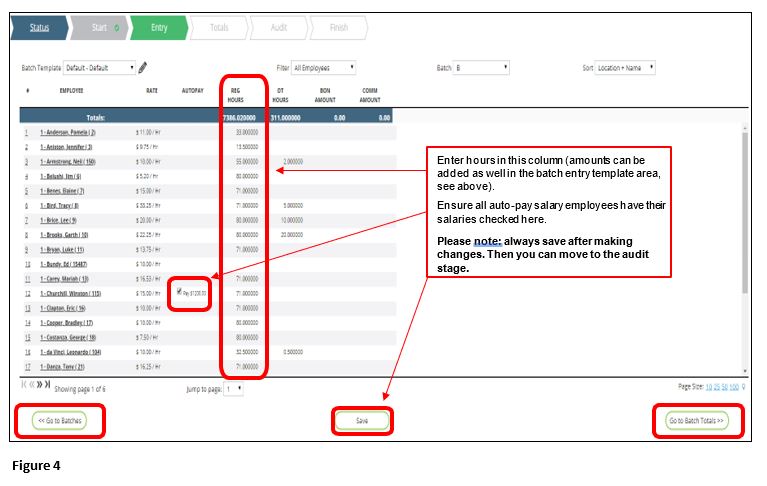
4. Once the batch entry template is set up, or if you already had one currently set up, you can enter the payroll (Figure 4).
Totals Page/Audit
After entering your payroll, the next step prior to submittal is the audit stage.
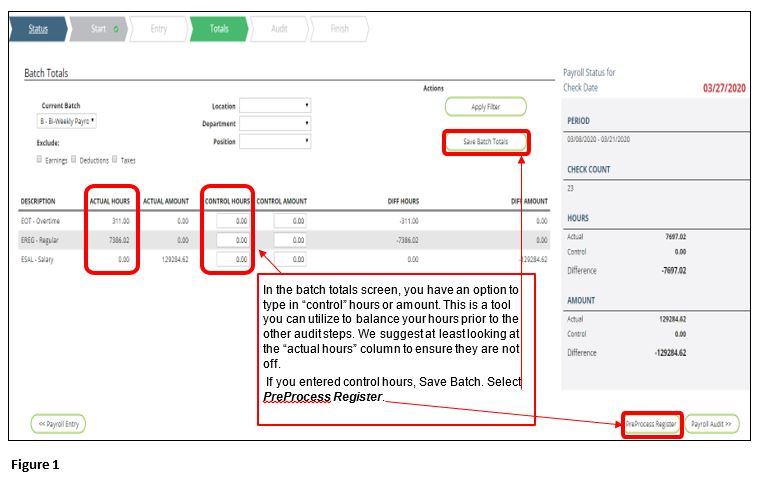
1. The first step of the audit stage is the Totals page that must be completed before moving to the audit tab/verifications test (Figure 1).

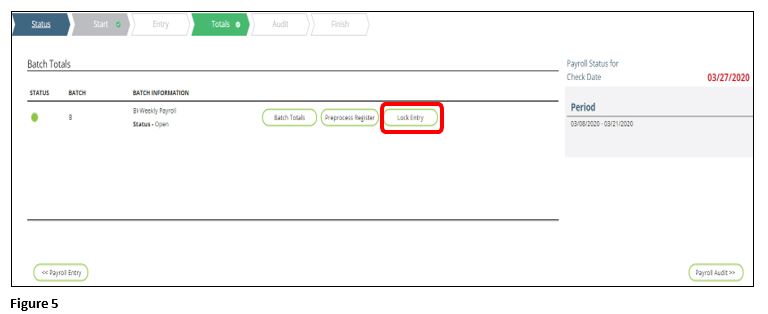
2. Step 1 of Totals Page- Batch totals screen (Figure 2).
3. Step 2 of Totals Page-Pre-Process Register (Figure 3).
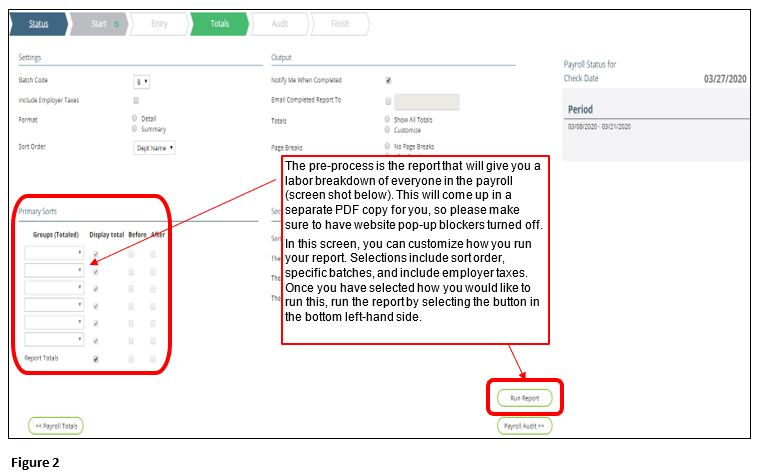
4. Sample of Pre-Process Register (Figure 3).
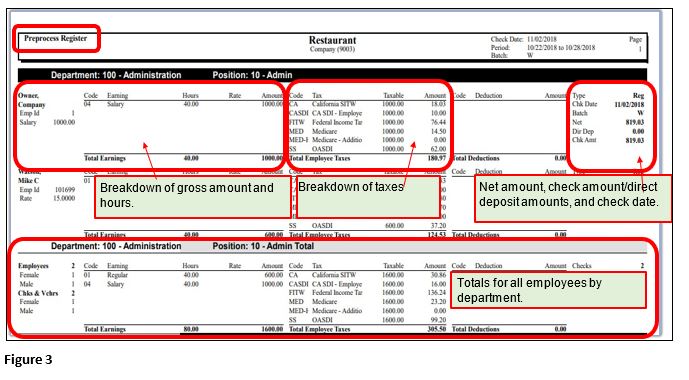
5. Once you have checked the pre-process register, we suggest either printing or saving the report. This particular report can only be run while payroll is open. Once that is complete, you can close the report and select Payroll Audit (Figure 4).
6. After your pre-process register has been checked and you are confident payroll is ready to go, select the Lock Entry button. You will need to do all of these steps on multiple batches (IE a Monthly AND Semi-Monthly batch, or a VM (Voids/Manual batch) (Figure 5).
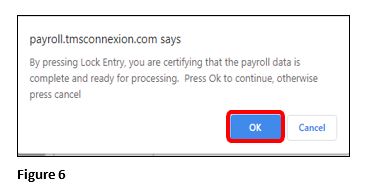
7. A box will appear asking you if you want to finalize the entry lock; click OK to continue (Figure 6).
8. Lock Entry will change to Entry Locked (Figure 7).

Audit Screen: IE Verification Testing
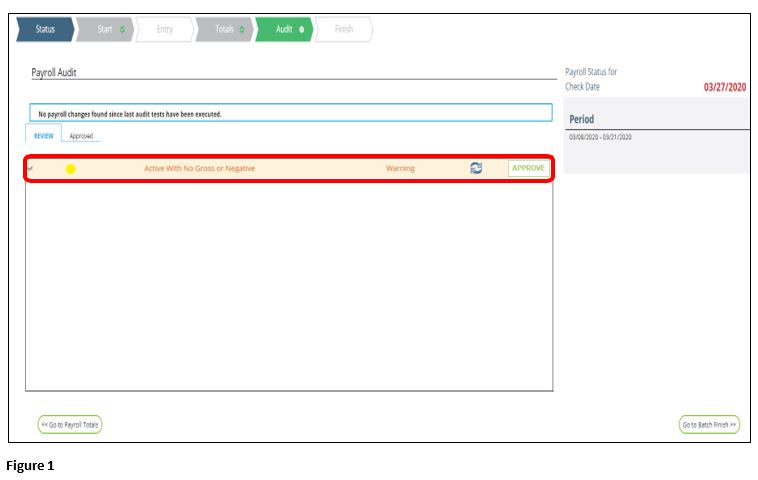
1. Once you have completed the totals page, you can move to the Audit screen, which is where the verification tests will automatically run (Figure 1). If there are no issues with the audit, you will not see anything in the Review area; any tests that have warnings will appear with a yellow warning.
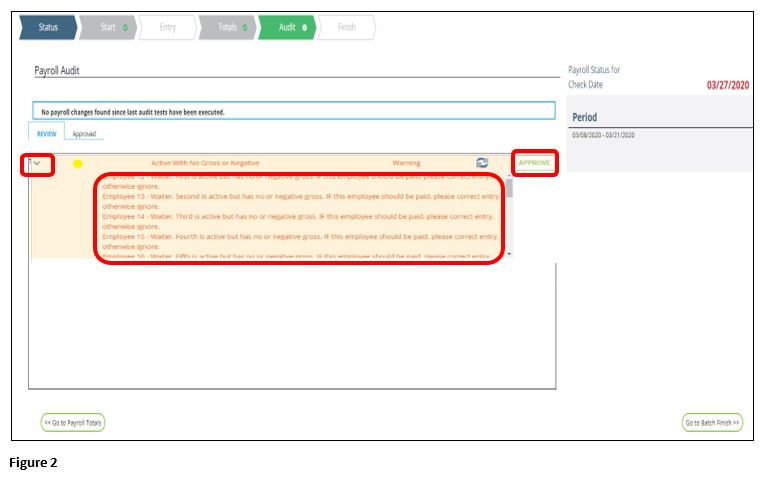
2. In this case the warning reads “active with no gross or negative”. This means that there is an employee in the payroll that is active without receiving a paycheck. To check this, expand the warning by utilizing the arrow down. If the employees are correct, and they should not be receiving pay, select Approve (Figure 2).
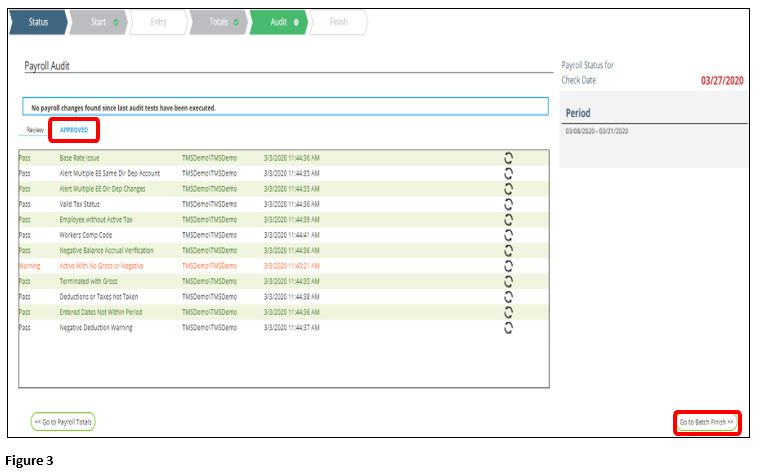
3. Once those are approved, you can select Go To Batch Finish. You can also view approved tests in the “approved” screen (Figure 3).
Submitting Payroll
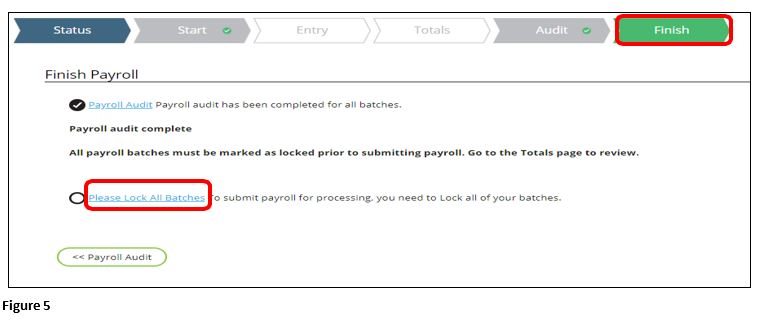
- From the Finish tab, if you do not lock the entries under the totals page the batches will need to be locked. Click Lock All Batches or click on the Totals tab and lock the batch. (Figure 1).
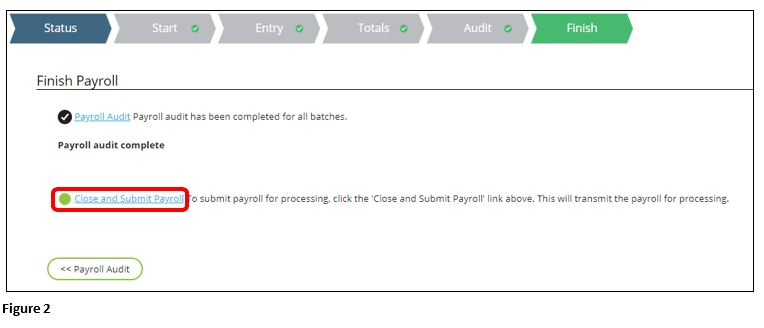
2. After the totals page and the audit stage is complete, you will reach the finish screen. Double check that the “payroll” audit button has a checkmark next to it and once you are completely ready to submit, select the Close and Submit Payroll button to release your payroll (Figure 2).
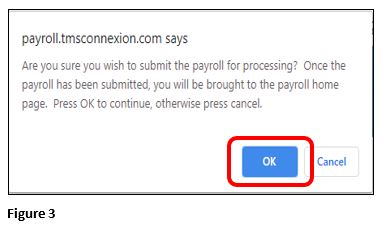
3. A pop-up window will come up asking if you are sure you wish to submit, click OK (Figure 3).
4. You will be taken to the Status tab will see that everything has been completed and submitted successfully (Figure 4).