How to Upload Documents from tmsPay for TMS Review
Summary
This document addresses work instructions for the steps necessary to upload important documents from tmsPay to TMS for review. We recommend using this in order to send important information, such as employee direct deposit information, social security numbers, company bank account changes, etc.
To Upload Documents:
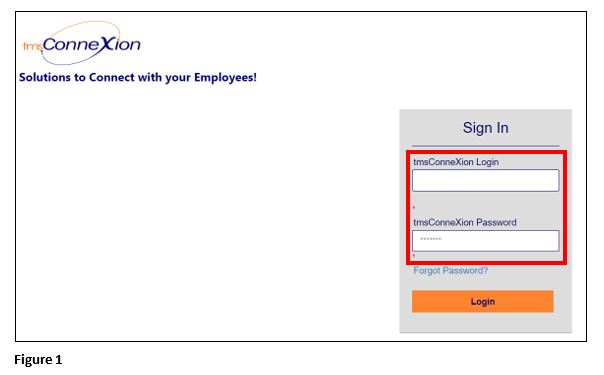
1. Log into tmsConneXion by entering your login credentials/password and clicking ‘Login’ (Figure 1). Upon the first time logging in, you will be prompted to change your password, which will be a random 6 character alpha/numeric password of your choosing.
2. Open the tmsConneXion menu by clicking on the hamburger menu icon (Figure 2).

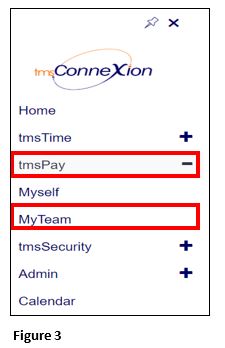
3. From the tmsConneXion menu, select tmsPay and MyTeam (Figure 3).
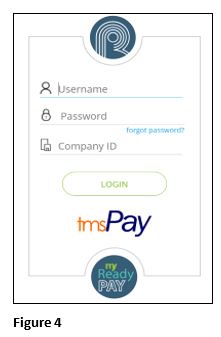
4. Log in with the User Name, Password and Company ID (Figure 4).
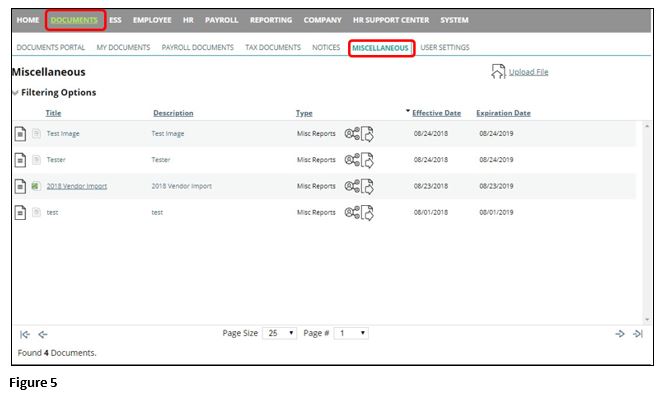
5. Click on the Documents tab and the Miscellaneous subtab. It may take a few moments to load (Figure 5).
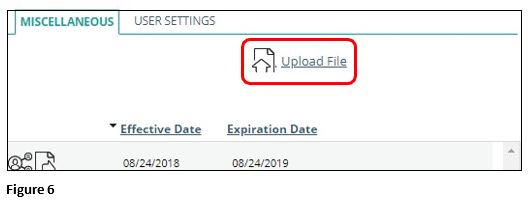
6. Click on Upload File (Figure 6).
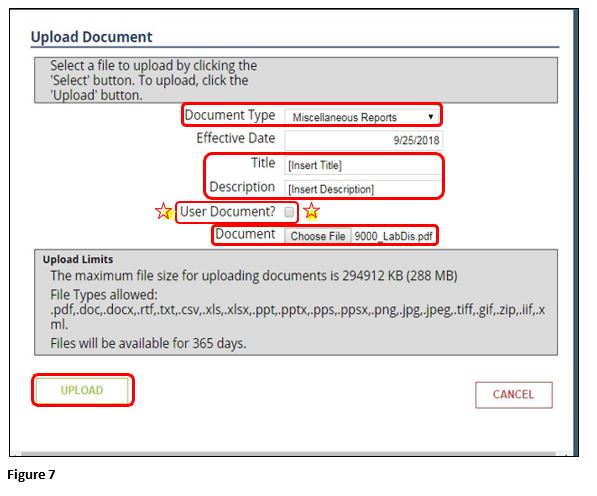
7. The box below will pop up. Follow the instructions below:
a. Choose “Miscellaneous Reports” as the Document Type.
b. Create a Title and Description for the document.
c. Choose your Document to upload
d. Click the Upload box once. It can take some time to upload (Figure 7).
**Note: Do not select the User Document Box as this will only allow you to see the document. See step 6 if you have selected User Document.**
8. Your document will now be listed. It should be the first option but may be lower down the list (Figure 8).

9. You are now done. Please email servicedesk@tmstime.com to let us know when a document has been uploaded for TMS’s review. Include the Title and/or Description of the document.
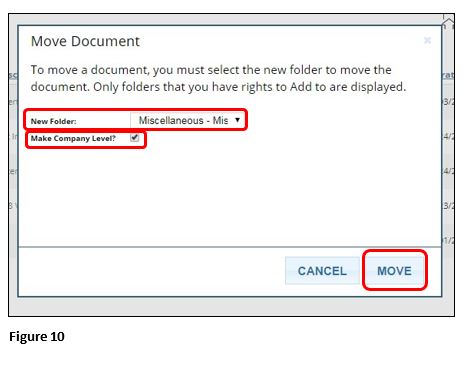
10. If you have accidently selected the User Document box, the item will still show up for you, but you will now see the Person Icon. Click on the Middle Icon to allow all users to see the document (Figure 9).

11. Choose the New Folder to be Miscellaneous and check the box for Make Company Level. Click Move when you are done (Figure 10).
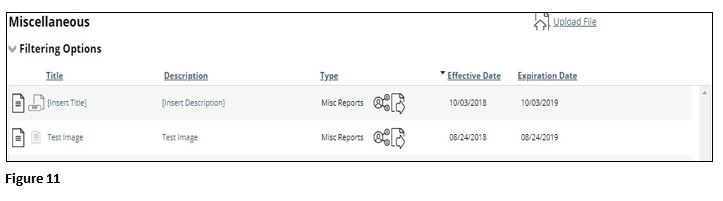
12. Your upload should look like the image below (Figure 11). Proceed back up to Step 7.