Preparing Payroll for BCG Export Using tmsTime2Pay with Chrome
Summary
This document addresses work instructions for how to run payroll with BCG using tmsTime2Pay with the Chrome internet browser.
To Run Payroll:
1. Log into tmsConneXion
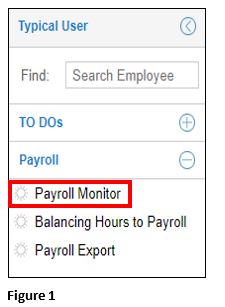
2. Select Payroll and Payroll Monitor from the quick menu (Figure 1).
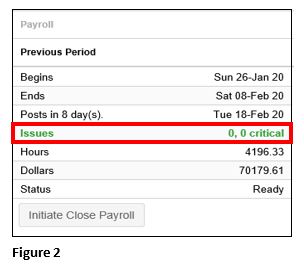
3. Confirm you have no critical issues in the Previous Period and the Issues row is Green (Figure 2). If you do have Critical exceptions, see Step 4, otherwise, skip to Step 8.
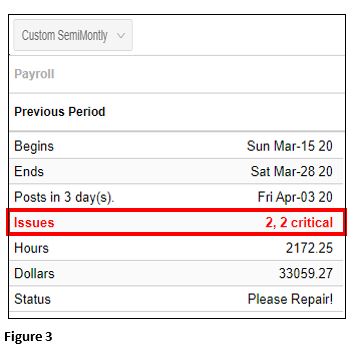
4. If you have Critical exceptions which are typically caused by missing punches, you will want to address these before running payroll. To see the Critical Exceptions, click anywhere in the Issues row (Figure 3).
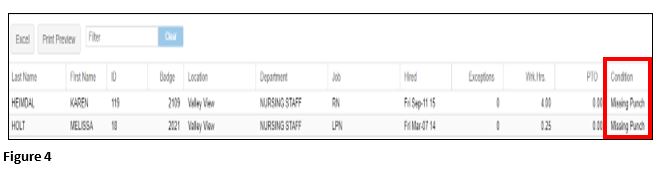
5. Upon clicking on the Issues, you will be taken to a list of employees who need something corrected; the Condition will alert you to the specific issue. Click on the employee’s name to be taken to their timecard where the exception can be fixed. Repeat this step for each employee on the list. (Figure 4).
6. On the employee timecard, look for the Missing Punch in the Description field; add the missing punch(es) (Figure 5).

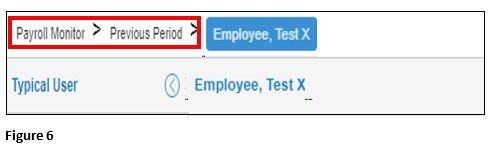
7. You may use the Breadcrumb Trail in the upper right-hand corner to either go back to your employee list (Previous Period) or back to the Payroll Monitor by clicking on your choice (Figure 6). Please note that the employee you just fixed may continue to show in the list.
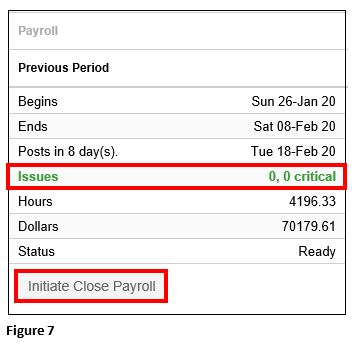
8. Once all of the Critical Exceptions have been fixed, Payroll Monitor will change the Issues row to Green and you are ready to proceed. Click on Initiate Close Payroll and the system will now run an employee recompute. This may take a moment to run. (Figure 7).
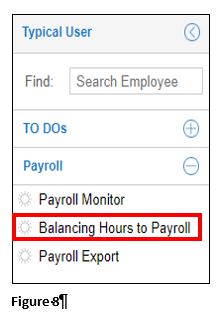
9. Back in the Manager Portal, select Balancing Hours to Payroll (Figure 8).
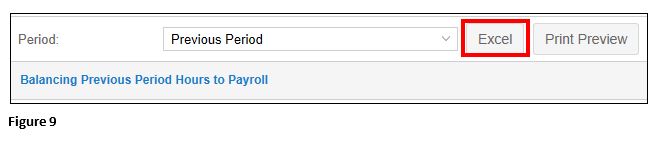
10. Select Excel (Figure 9).
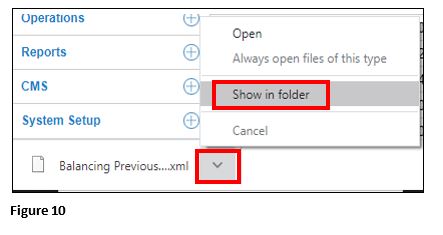
11. An .xml file will open at the bottom of the screen; click the arrow and select Show in folder (Figure 10) . Please note, the location of the file is browser dependent. It may also load in the upper righthand corner, but it will be in the Download folder.
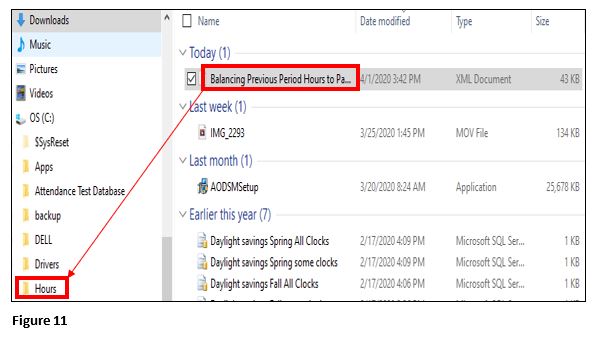
12. From the Download folder, move the Balancing Previous Period file to the payroll folder; in this example we will use the Hours folder (Figure 11).
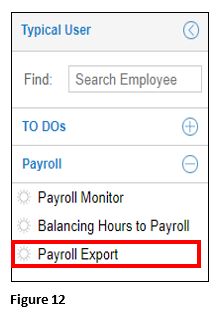
13. From the Quick Menu, select Payroll and Payroll Export (Figure 12).
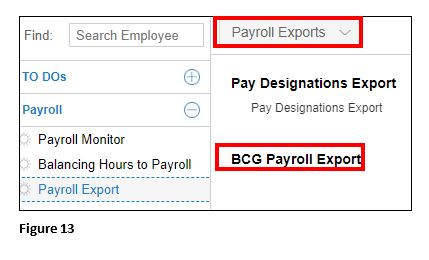
14. Select Payroll Exports from the dropdown menu and click BCG Payroll Export (Figure 13).
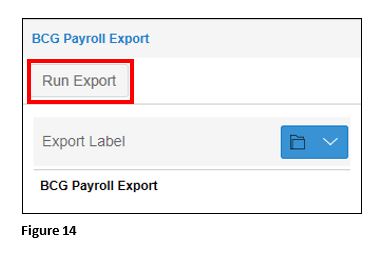
15. Click Run Export (Figure 14).
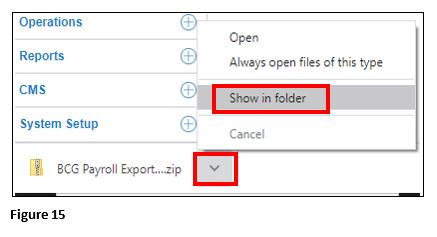
16. A zipped file called BCG Payroll Export will open at the bottom of the screen; click the arrow and select Show in folder (Figure 15).
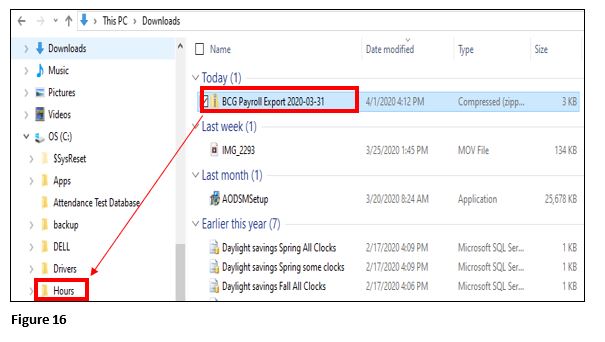
17. From the Download folder, move the BCG Payroll Export zipped file to the same folder as before; again, in this example we will use the Hours folder (Figure 16).
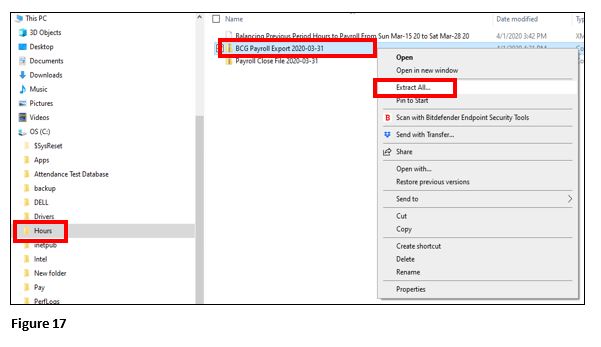
18. From the Hours folder and right click on the BCG Payroll Export and select Extract All (Figure 17).
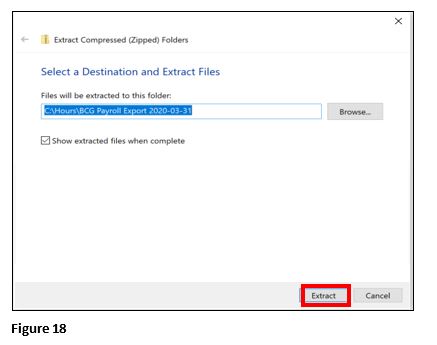
19. You will be asked if you want to move the files to a different folder; keep them where they are at and select Extract (Figure 18).
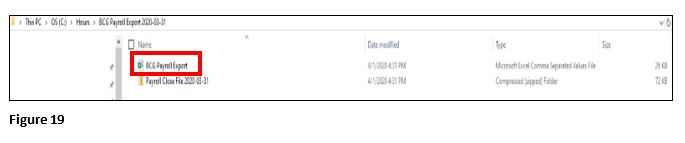
20. You will be shown the extracted Excel file (Figure 19); you may close or minimize this.
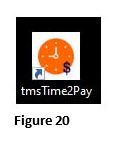
21. Open tmsTime2Pay (Figure 20).
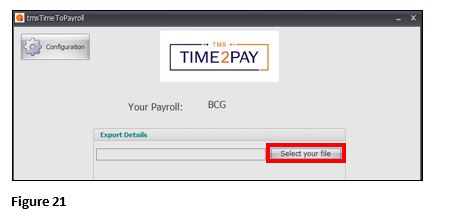
22. Click Select Your File (Figure 21).
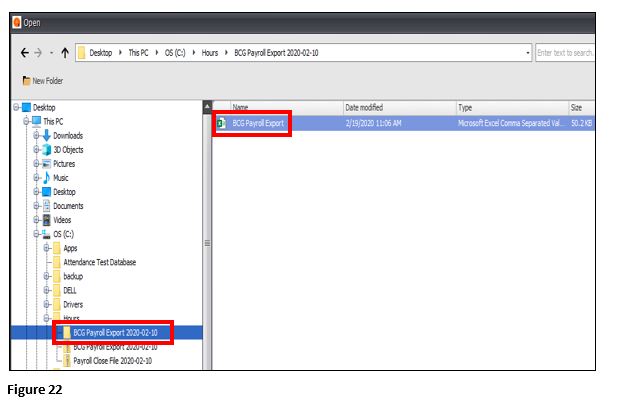
23. Navigate to your payroll folder where you saved the Excel payroll file; in this example we saved to the Hours folder. Please note that when you extracted your file, a new folder was created called BCGPayrollExport that contains the Excel file. Open the new folder and double click on your BCGPayrollExport Excel file. (Figure 22).
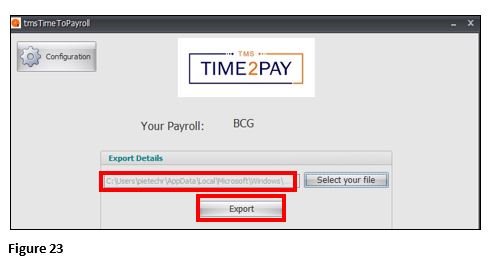
24. The file will display in the Select Your File field; click Export (Figure 23).
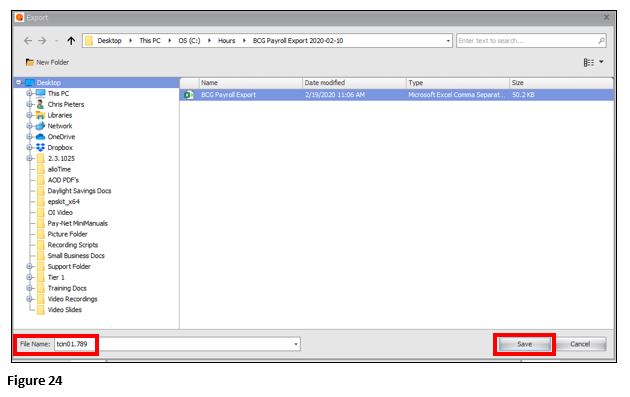
25. A file will be created called tcin01 in the same folder; click on Save for this file (Figure 24).
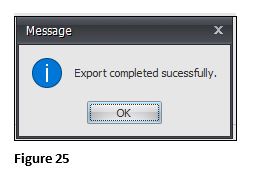
26. If successful, you will see the following dialogue box (Figure 25).
27. Send the BCG Payroll Export file, tcin file and the Balancing Previous Period Hours to Payroll file to BCG for processing.