How to Set Up Guided Access for Apple Devices
Summary
This document addresses work instructions on how to set up Guided Access for Apple devices and can be used when an iPad is setup as a time clock.
Guided Access limits the device to a single app and lets the administrator control which features are available. Guided Access can be turned on when the Apple product is used as a time clock along with tmsConneXion.
Set up Guided Access
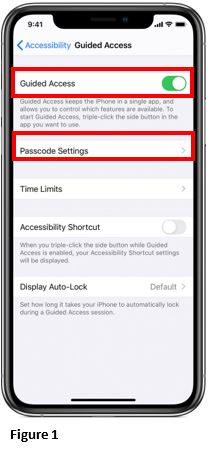
1. Go to Settings > Accessibility>Guided Access; turn on Guided Access (Figure 1).
2. Tap Passcode Settings
3. Tap Set Guided Access Passcode.
4. Enter a passcode, then re-enter it.
From here, you can also turn on Face ID or Touch ID as a way to end a Guided Access session.
Start a Guided Access session
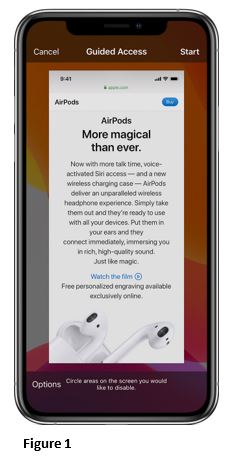
1. Open the app (tmsConneXion) that you want.
2. On an iPhone X or later, triple-click the side button. On an iPhone 8 or earlier, triple-click the Home button.
3. If you want parts of your screen to stop responding to touch, use one finger to circle those areas. You can move or resize the circle or tap the X to remove it.
4. Tap Guided Access, then tap Start (Figure 1).
Control Which Features are Available
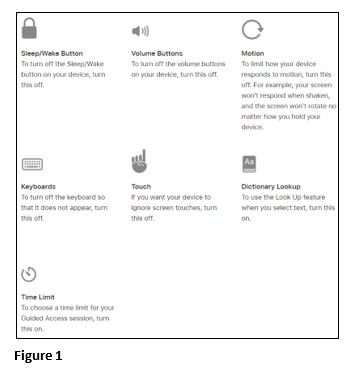
1. To turn off features or set a time limit, triple-click the Side or Home button, then tap Options. If you don't see Options, triple-click the Side or Home button again and enter your passcode.
2. Turn on the options that you want, then tap Done.
End a Guided Access Session
1. Triple-click the Side or Home button.
2. Enter your Guided Access passcode.
3. Tap End or if Touch ID or Face ID for Guided Access were turned on, double-click the Side or Home button.