How to View Candidates to Assign to Open Schedules in Visual Scheduling
Summary
This document addresses work instructions for managers on how to view candidates to assign to open schedules in Visual Scheduling.
Viewing Candidates
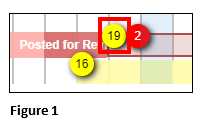
1. If the template shows a yellow badge, there are less employees (underages) scheduled to work then the schedule requires (Figure 1).
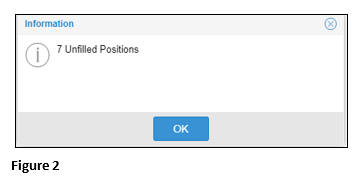
2. You may click on the yellow badge for more detail (Figure 2).
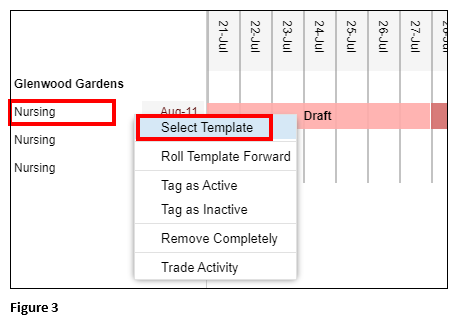
3. Select the template that has the yellow badge and click Select Template from the menu (Figure 3).
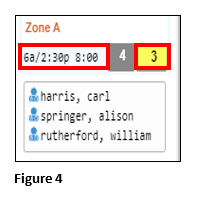
4. Find the yellow badge that indicates an employee overage and click on the schedule (Figure 4).
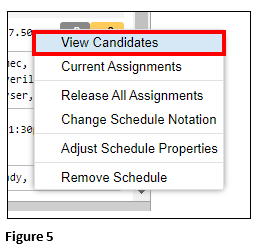
5. From the menu, select View Candidates (Figure 5).
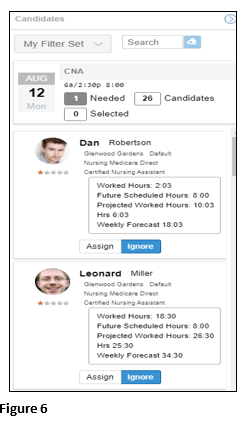
6. The Candidate List will appear on the right side of the screen (Figure 6).
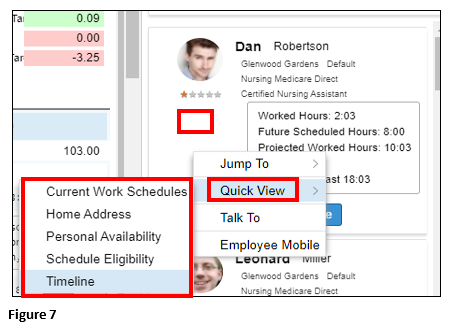
7. Optional: To view information that may assist in assigning the correct employee, click in the white space under the employee’s picture, select Quick View and then select the appropriate menu item. For example, the scheduler may want to select a candidate that works closer to the office; select Home Address (if entered) to see how far the employee lives from the office (Figure 7).
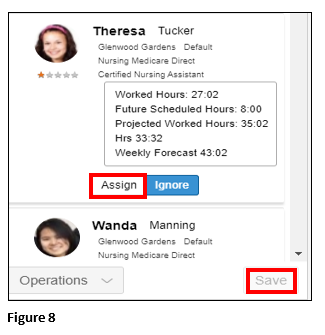
8. Once the appropriate candidate has been found, click Assign and Save (Figure 8).
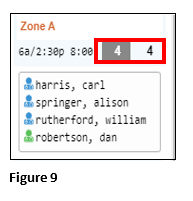
9. The yellow badge has now been removed as the number of employees needed now matches the schedule (Figure 9).