Configuring tmsConneXion Kiosk in tmsConneXion v4
Summary
This document addresses how to set up tmsKiosk in tmsConneXion v4. Companies using tmsKisok can set up Manager Transfer Restrictions, Employee Transfer Restrictions and Single Workgroup Restrictions. Payroll Managers may also choose to mask the employee/badge, hide or show Transfer options and hide or show the Employee Review as well.
Setting Up Manager Transfer Restrictions
Those users with access to the Configuration menu option will have the ability to set Manager Workgroup Restrictions in tmsKiosk. Manager Workgroup Restrictions will allow a company to limit all employees from specific workgroup sets to only see transfer options to specific workgroup sets.
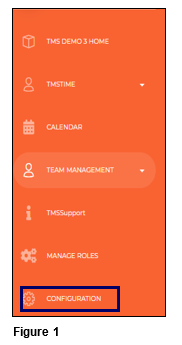
1. Open the Configuration menu option (Figure 1).
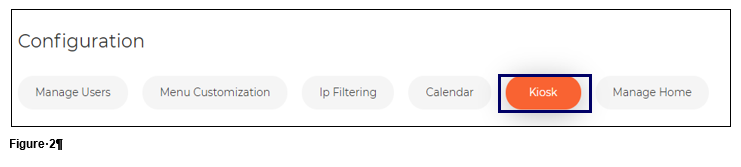
2. Select Kiosk (Figure 2).
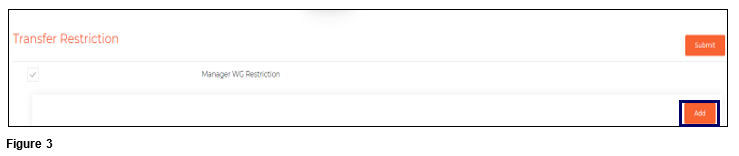
3. To set Manager WG Restrictions, check the box and click Add (Figure 3).
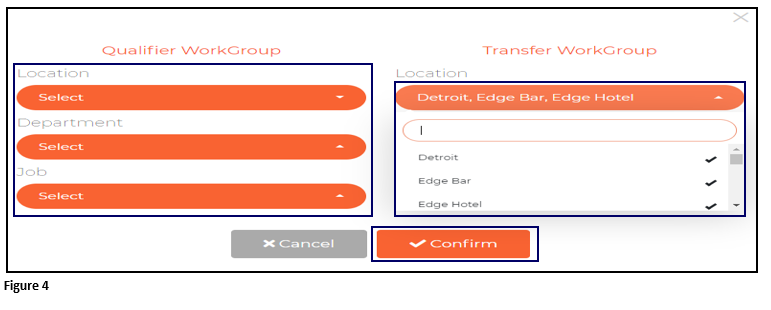
4. On the left-hand side of the box, select the Qualifier Workgroups which are the workgroups of the group of employees whom the user wishes to limit. On the right-hand side, select the Transfer Workgroups which will be the only transfer options that will be visible. Mulitple selections can be made at a time by clicking on the Workgroups and the selected Workgroups will be designated by a checkmark. Once done, click Confirm (Figure 4).
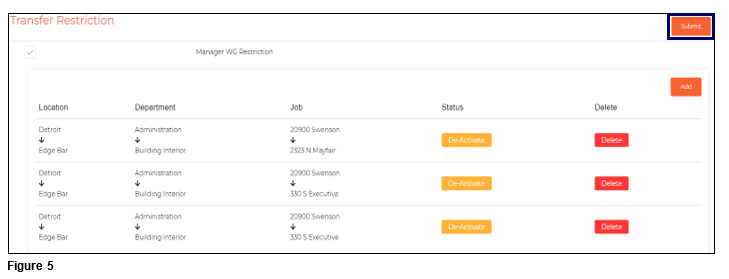
5. These steps can be repeated for each restriction if being done one at a time and when done, click Submit (Figure 5).
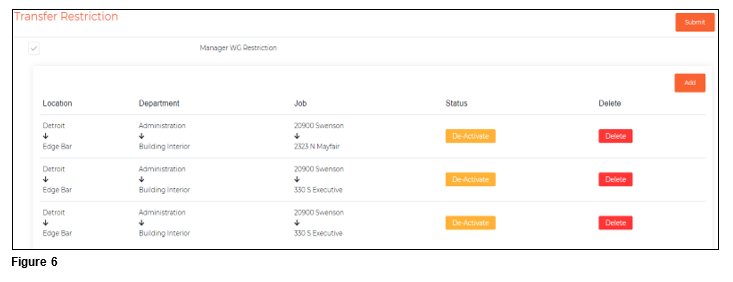
6. To suspend a Workgroup Restriction, which will allow it to quickly be added back, click De Activate. To remove the Workgroup Restriction from the list, click Delete (Figure 6).
Setting Up Employee Transfer Restrictions
Employee Workgroup Restrictions can also be setup for tmsKiosk. Employee Workgroup Restrictions will allow a company to limit a specific employee from specific workgroup sets to only see transfer options to specific workgroup sets.
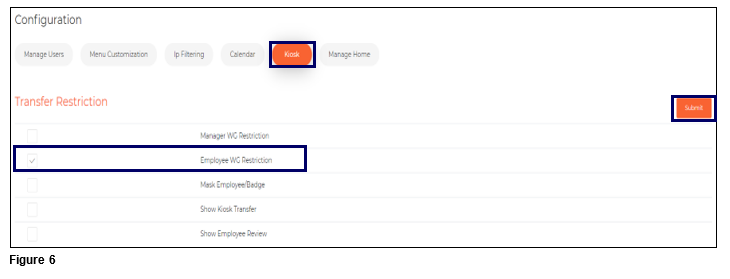
1. From the Configuration menu and Kiosk tab, check the box next to Employee WG Restriction and click Submit (Figure 7). Please note: if both Manager Workgroup Restrictions and Employee Workgroup Restrictions are set on the same employee, Employee WG Restrictions take priority.
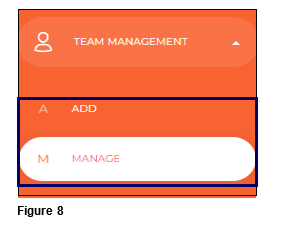
2. Once submitted, users will now be able to set up any individual employee with Employee Workgroup Restrictions. From the Team Management menu, select either Add to create a new employee with restrictions or Manage to open the list of current employees (Figure 8).
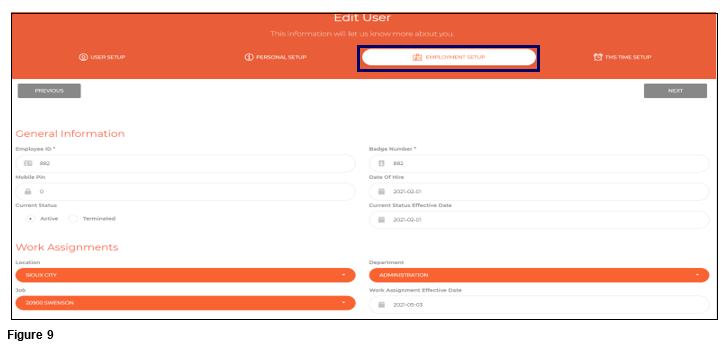
3. When either creating or editing a current employee, the user can add Employee Workgroup Restrictions on the Employment Setup tab (Figure 9).
4. Select Add to set up the Transfer Assignments (Figure 10).

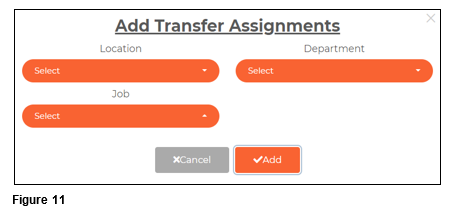
5. On the Add Transfer Assignments box, select the appropriate workgroups for the first restriction and click Add. Repeat this process to add more restrictions (Figure 11).
6. Once the restrictions have been added, click Save (Figure 12).

Setting Up Single WG Transfer Restrictions
The number of transfer options (workgroup options) shown to employees using the transfer in tmsKiosk may be reduced by using Single WG Transfer. Each workgroup can be checked allowing the employee to see and select only the options the administrator wants them to see when transferring.
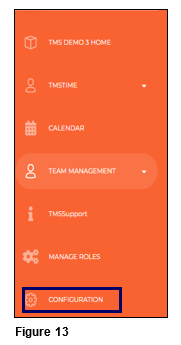
1. From the tmsConneXion menu, select Configuration (Figure 13).
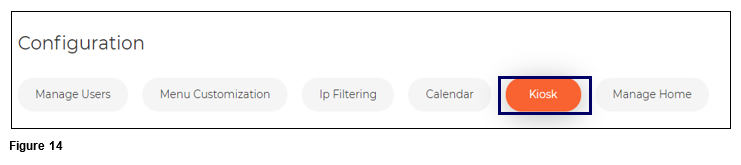
2. Select Kiosk (Figure 14).
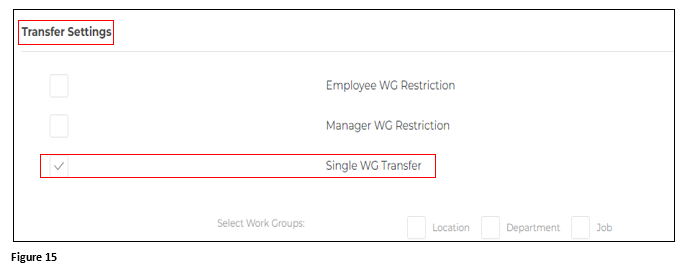
3. Under Kiosk, click on Transfer Settings and the menu will open; check the box next to Single WG Transfer (Figure 15).
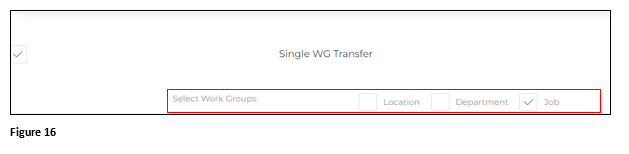
4. Check the boxes next to the workgroups that employees will have to select when they transfer (unchecked workgroup boxes will not display). Click Submit to save the change. Please note that this will limit the workgroups visible on both Employee WG and Manager WG Restrictions as well (Figure 16).
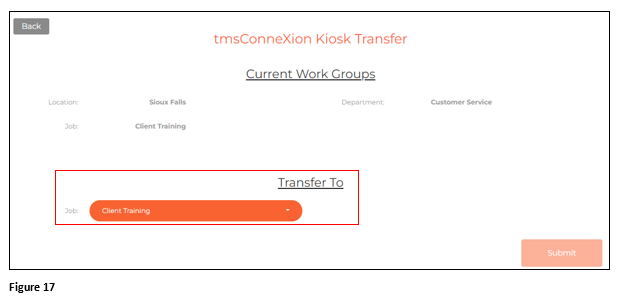
5. The employee will see the WG transfer options available to them (Figure 17).
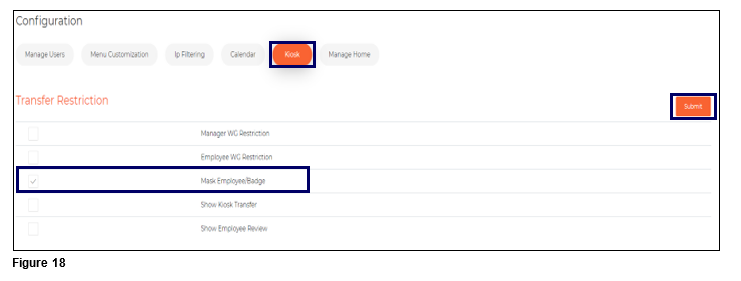
Setting Up Mask Employee/Badge
Users can set up Kiosk so the employee’s ID/Badge will be hidden as typed by ‘*’; this is typically done for privacy purposes.
1. From the Kiosk tab, check the box next to Mask Employee/Badge and click Submit (Figure 18).
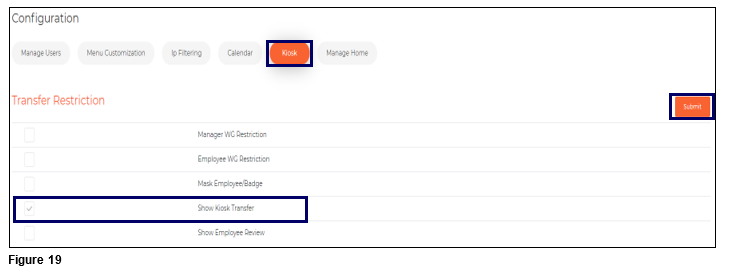
Show Kiosk Transfer
If an organization does not allow their employees to transfer workgroups, users can set up Kiosk so the Transfer option will be hidden.
1. From the Kiosk tab, check the box next to Show Kiosk Transfer and click Submit (Figure 19).
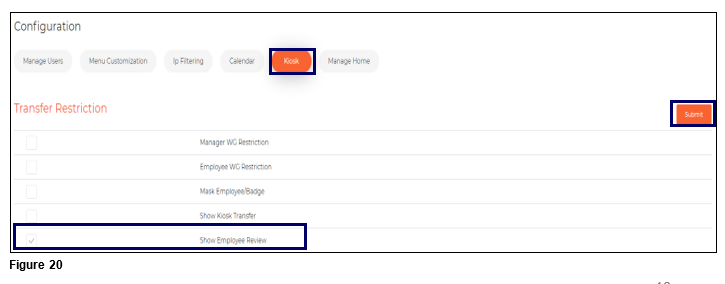
Show Employee Review
tmsKiosk allows employees to review their schedules (if used), punches, hours worked and time off. Payroll Managers and those with proper rights can turn this feature on or off.
1. To turn on/off, from the Kiosk tab, check or uncheck the box next to Show Employee Review and click Submit (Figure 20).