How to Create a New Employee (User) in tmsConneXion v4
Summary
This document addresses how to create a new user in tmsConneXion v4.
Creating a New User
Those with the tmsConneXion Admin or a Custom Right with Add User rights will have the ability to Add, Edit and Delete all employees.
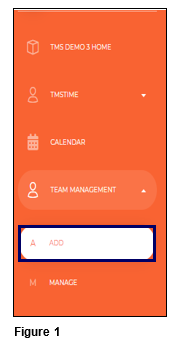
1. To Add a new employee, select Team Management and Add (Figure 1)
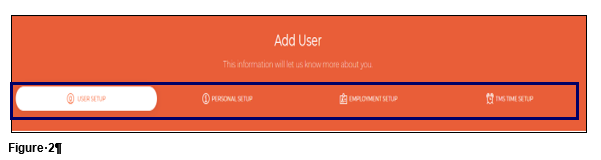
2. The user will now utilize the Employee Setup Wizard to create their new employee.. The Setup Wizard has four sections: User Setup, Personal Setup, Employment Setup and TMS Time Setup and the Wizard will walk the user through each section as they get completed (Figure 2).
Employee Wizard—User Setup
The first section of the Employee Wizard is User Setup (Figure 1).
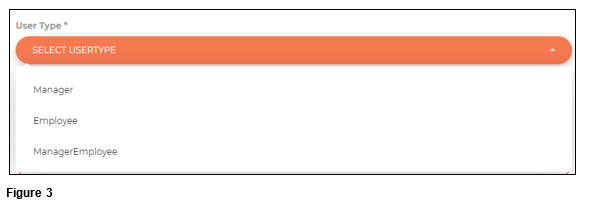
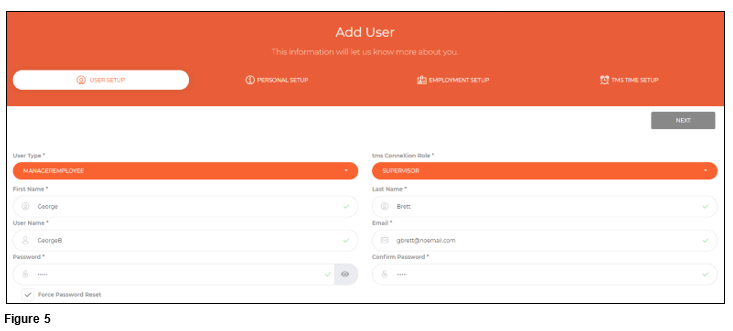
3. Start by selecting the employees User Type.
a. Manager—gives access to MyTeam in tmsTime.
b. Manger/Employee—gives access to both MyTeam and MySelf.
c. Employee—Gives access to MyTeam.
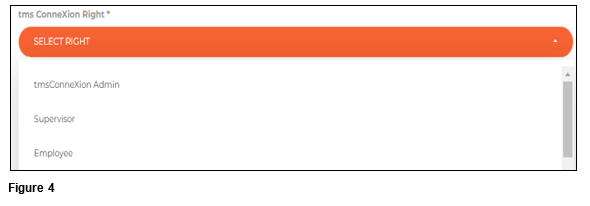
4. Select the tmsConneXion Right (Figure 4).
a. tmsConneXion Admin
i. Can Add/Edit/Term employees through Operations/Manage User.
ii. Their Employee dashboard will show Total, Active and Inactive Employees.
iii. Can add other tmsConneXion Admin (ONLY rights that can do this).
iv. Can add/edit employee Rights.
v. Access to Configuration where they can:
1. Customize Menus
2. IP Filtering
3. Set Calendar hour view
4. Manage Kiosk
5. Manage Home
b. Supervisor
i. Access to view employee’s assigned information to them under Manager.
ii. Their Dashboard will show Total, Active and Inactive Employees for those they have access rights to
c. Employee
i. Access to view their own information under Manage.
ii. Can change their personal and emergency contact phone numbers.
d. Custom
i. Custom Rights are created to give rights that the standard Rights don’t.
ii. These will have user created names and will display in the list when active.
5. Fill in all of the required fields designated with ‘*’. As a reminder, those with a User Type of either Manager or Employee/Manager are required to have an email address. Passwords must be at least 6 characters/numbers and may contain Special Characters. Once done, click Next (Figure 5).
Employee Wizard—Personal Setup
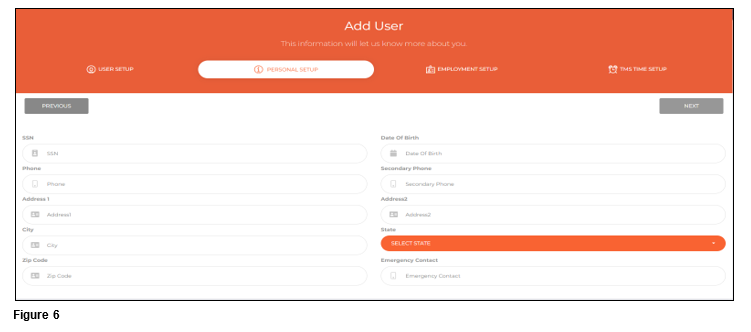
The second section of the Employee Wizard is Personal Setup.
6. The information entered on this section is not required so users can fill it in based on their companies’ requirements. When done, click Next (Figure 6).
Employee Wizard—Employment Setup
The third section of the Employee Wizard is Employment Setup.
7. The user will fill in the General Information which includes the Employee ID, Badge Number, Mobile PIN and Date of Hire (Figure 7). Available Badges may be used to pull of a list of already used but released badge numbers.

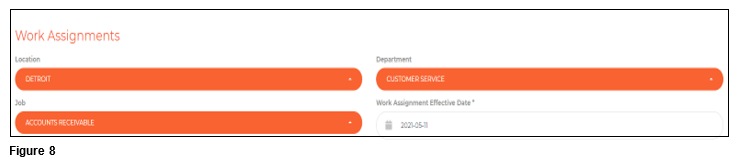
8. Select the employees’ Work Assignments which are based on the workgroup levels (Figure 8).
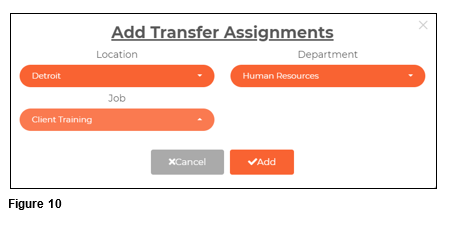
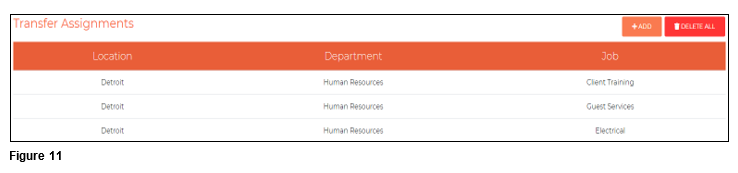
9. Transfer Assignments will be used only if the company is using tmsKiosk and will only be visible if the Employee WG Restrictions box is checked on the Configuration/Kiosk page. If the employee will have the ability to transfer on Kiosk and will need individual transfer restrictions, select Add to set up the Transfer Assignments. If the employee has no restrictions, or a manager restriction set instead, this can be left blank, and the user may click Next. Employee Transfer Assignments can be set over the top of manager restrictions and will take priority if both are used (Figure 9). Please note that transfer restrictions can be added/edited at a later time.

10. On the Add Transfer Assignments box, select the appropriate workgroups for the first restriction and click Add. Repeat this process to add more restrictions (Figure 10).
11. Once the restrictions have been added, click Next (Figure 11).
Employee Wizard—TMS Time Setup
The final section of the Employee Wizard is TMS Time Setup.
12. The user will fill in the Pay Class, Pay Type, Hourly Status and Clock Group which are required fields. Rate of Pay may be entered as well. The Effective Dates for each of these will default to the current date; change as necessary. Employees may also be assigned to an existing Schedule Pattern (if created). It is recommended to start this on the next pay period. To see the days/hours of the pattern, please see Schedule Patterns in MyTeam (Time and Attendance software) (Figure 12).

13. If the user is creating an employee with the User Type of Manager or Manager/Employee, they will also need to fill out the Manager Setup area. Those setup as an Employee will not see this section. Select the appropriate Profile and User Group from the list provided by clicking on the arrow (Figure 13).

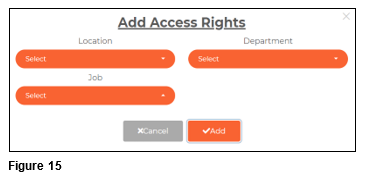
14. Select the manager’s Access Rights which will determine which employees they will see on Mange User as well on MyTeam, one at a time as applicable by clicking Add (Figure 14).

15. Use the arrows in each workgroup to assign rights one at a time. Repeat this process as necessary to add more rights to the Manager (Figure 15).
16. Click Finish and the new employee has been created.