How to Manage IP Filtering in tmsConneXion v4
Summary
This document addresses how to manage IP Filtering in tmsConneXion v4. IP Filtering allows control of where employees will be able to login to tmsConneXion, tmsKiosk and/or tmsTimeClock; employees from outside the network will be denied access.
Setting IP Filtering
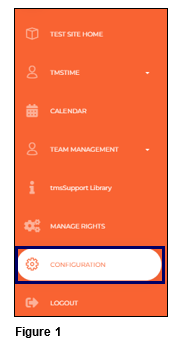
1. Select Configuration from the menu (Figure 1).
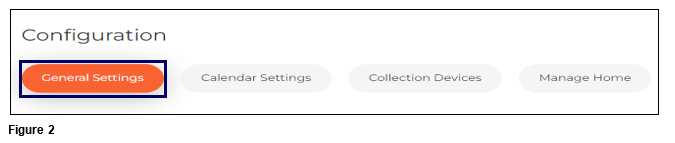
2. Select the General Settings tab (Figure 2).
3. Type in the IP Address(es) in the Restrict Access box; place a ‘;’ between multiple addresses. Check the Controlled Apps boxes for the software to be filtered.
a). All: when checked will select and IP Filter all App options.
b). Login: when checked, will IP Filter the tmsConneXion log in screen.
c). Kiosk: when checked, will IP Filter tmsKiosk (desktop version).
d). Time Clock Web Page, when checked, will filter Time Clock
When done click Submit (Figure 3).

Please note that hovering over the ‘i’ next to Restrict access from outside of your network will remind the user that by entering IP addresses and if they are using the tmsConneXion Mobile app, that the Punch button will be filtered away from premise.
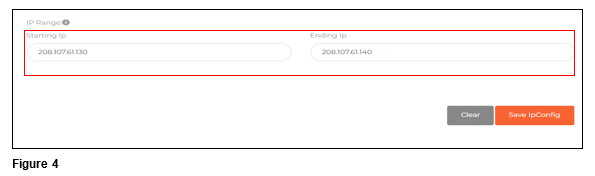
4. If the organization has a block of IP addresses, IP Filter Range may be used. Use the Starting IP and Ending IP boxes in the IP Range area to set the range filter. When the range has been entered, click Submit (Figure 4). Please note, the first three sets of numbers of the IP range for both the starting and the ending IP range will be the same. The last set of numbers will determine the range of IP addresses that are allowed network access.
Employees attempting to log in from outside of the IP Network will now be denied access.
Removing an IP Address Filter
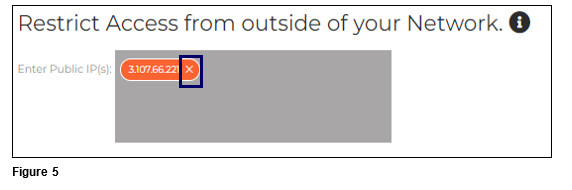
1. To remove an IP Filter, navigate back to the General Settings tab. Either hover or click on the IP Filter, click the ‘x’ and the filter will disappear (Figure 5).
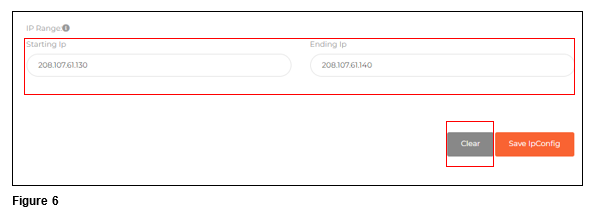
2. To remove an IP Range, click Clear and Submit (Figure 6).