How to Approve Time Off Requests
Summary
This document outlines how to view and approve employee time off requests.
Viewing Time Off Requests
1. There are multiple places to see time off requests. Once logged in to MyTeam (Manager Portal), the user will see the Calendar Dashboard. Each day there is a leave request, it will be noted (Figure 1).
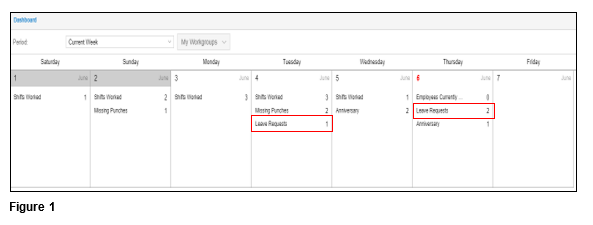
2. To view the employees making the requests, click on Leave Requests. Please note that time off requests show on the day they were requested, not the date of the request.
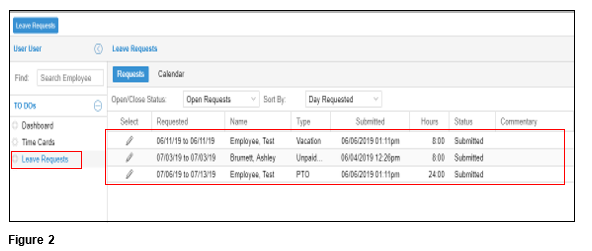
3. Leave Requests may also be accessed by clicking on Leave Requests from the menu under the TO DO’s in the left-hand column. Accessing from either the Dashboard or the menu item will bring a list of all open requests. To view a specific employee’s request, click on the pencil. The user will have the ability to view by Open/Close Status and/or sort by the Day Requested, Date of Hire, Date of Full Time and Date Submitted (Figure 2).
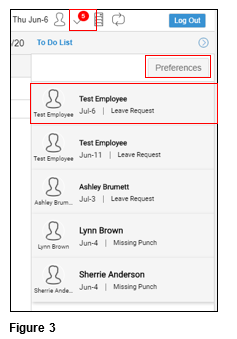
4. The user may also see a list of time off requests from the To Do List. Click the button to open the list and open time off requests will be shown; click on the employee name to proceed to the approval process (Figure 3). Please note that the user has the ability customize what shows in the To Do List by selecting Preferences.
Time Off Request Decisions
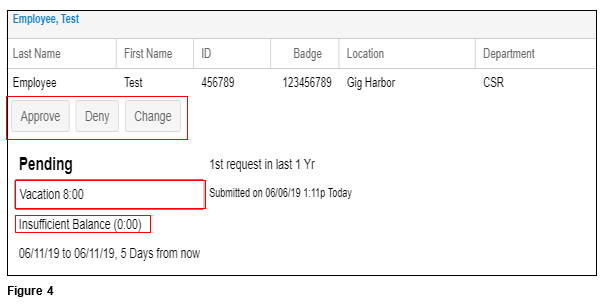
1. Once the employee’s time off request has been selected, the approval page will display. The user will have the option to Approve, Deny or Change the request. The benefit request will show as well as the balance information (Figure 4).
Time Off Approval
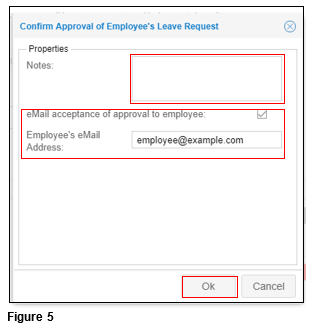
2. To approve the time off request, select Approve and the Confirm Approval of Employee’s Leave Request box will pop up. Add optional Notes (if needed) and add the employee’s email address and other users such as managers and/or administrators to send them confirmation of the approval. Click OK (Figure 5).
Time Off Denied
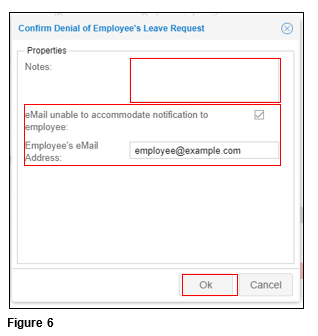
3. To deny the time off request, select Deny and the Confirm Denial of Employee’s Leave Request box will pop up. Add optional Notes (if needed) and add the employee’s email address and other users such as managers and/or administrators to send them confirmation of the denial. Click OK (Figure 6).
Time Off Change
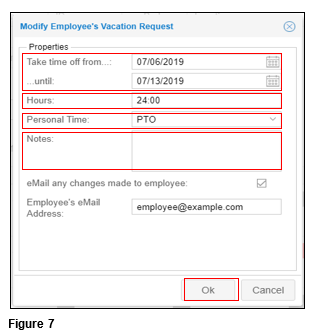
4. To change the time off request, select Change and the Modify Employee’s Vacation Request box will pop up. Select the any of the following to change, the Date of the absence, the amount of time and/or the benefit to be used. Add optional Notes and the employee’s email address (plus any additional email addresses) to send them confirmation of the changes. Select OK (Figure 7).
Employee Cancelation
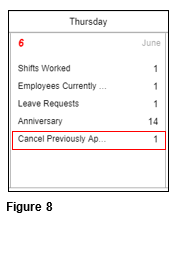
1. An employee may decide they want to cancel a previously approved time-off request. Once the employee has requested the cancelation, it will show up on the Dashboard as Cancel Previously Ap(proved) (Figure 8).
2. After clicking Cancel Previously Ap(proved) has been clicked, the manager will be taken to the time-off request where they will have the option to either Revoke Approved Leave or Deny Request. The manager may also get to the same area by clicking on Leave Request from the menu and changing the status to Re-Opened (Figure 9).
