Creating Schedules by Employee Workgroup
Summary
This document addresses work instructions on how to create schedules by employee workgroup.
Setting up customized workgroups allows the user to set a schedule for all employees within those workgroups efficiently.
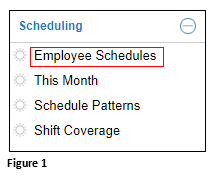
1. From the quick menus, select Scheduling and Employee Schedules. Please note that the menu name may vary (Figure 1).
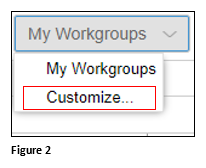
2. From My Workgroups, select Customize (Figure 2).
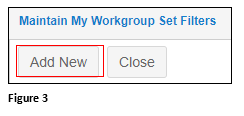
3. Under Maintain My Workgroup Set Filters, click Add New (Figure 3).
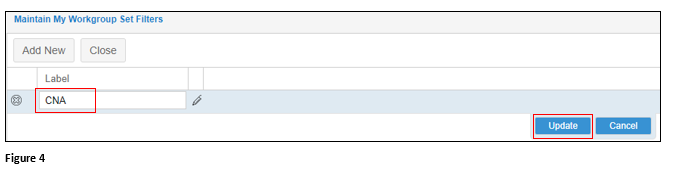
4. Under Label, click on New Group and rename the group. Click Update and the new name will be applied (Figure 4).
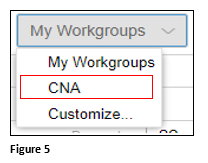
5. Hit F5 to refresh and newly created group will display in the My Workgroups list (Figure 5).
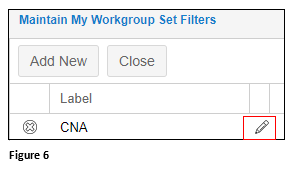
6. Click the pencil icon next to the newly created workgroup (Figure 6).
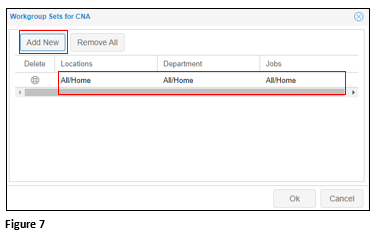
7. Click Add New and All workgroups will display (Figure 7).
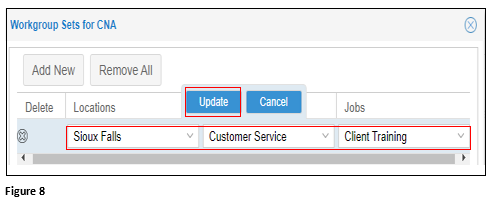
8. Click each individual workgroup and use the dropdown arrows to make the selections that will be added to the customized My Workgroup. Click Update when the selections are done and click OK (Figure 8).
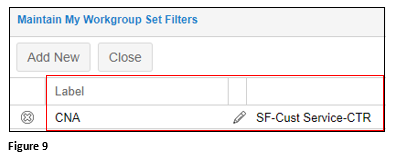
9. The Filter will now contain the Label Name and the selected workgroups (Figure 9).
10. Build the Schedule Pattern(s). See How to Setup Schedule Patterns in the tmsSupport Library.
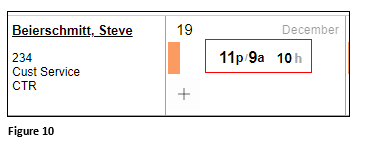
11. When an employee from the customized work group changes a shift from the Schedule Pattern, click on the schedule on the appropriate date (Figure 10).
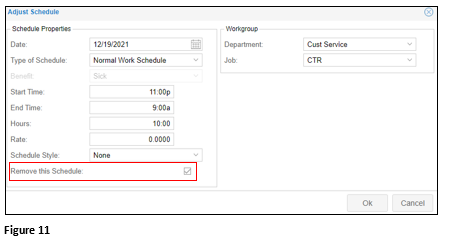
12. Check Remove this Schedule and click OK. The schedule will be removed from the day (Figure 11).
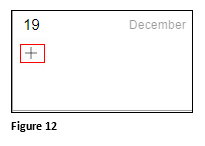
13. Click the ‘+’ in the now empty date (Figure 12).
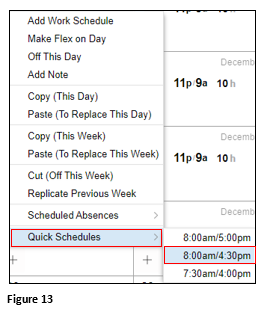
14. From the menu, select Quick Schedules and the appropriate new schedule for the employee. Please note, Quick Schedules must be added originally by TMS (Figure 13).
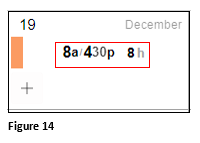
15. The new schedule will now display on the appropriate date (Figure 14).