Adding User (Login) Accounts in tmsTime
Summary
This document addresses work instructions on how to add a user account in Core.
Adding a User
When adding a user account in Manager Self Service 3 (MSS3), you will need to define some basic operator properties and the operator’s workgroup access rights.
To add a user account:
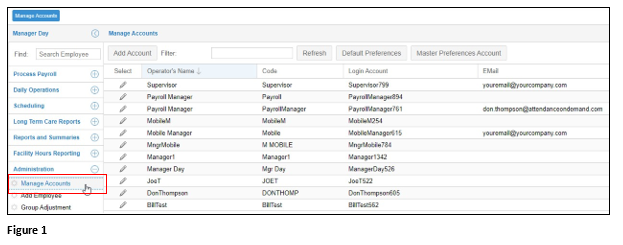
1. Click the Manage Accounts menu item (Figure 1).
2. Click the Add Account button in the Manage Accounts page (Figure 2).

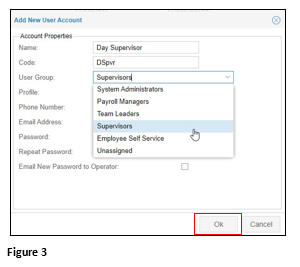
3. Fill out the employee information, using the drop-down box when available. Please note, the Code field has a 10-character limit. Click OK when done (Figure 3).
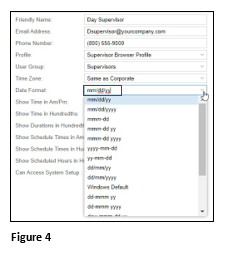
4. Select a Time Zone and the Date Format to be used in the Basic Operator Properties page (Figure 4).
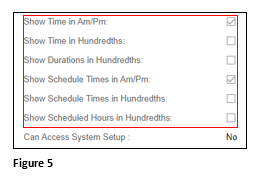
5. Select the format for how Time will be presented in areas such as Time Cards and Schedules (Figure 5).
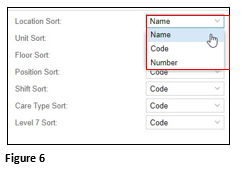
6. Select how Workgroup Levels will be presented (Name, Code, Number) (Figure 6).
Workgroup Access Rights
1. Click the Basic Operator Properties drop-down list and select Operator Workgroup Access Rights (Figure 7).

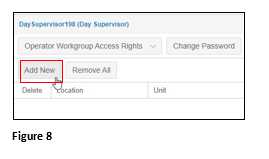
2. Click the Add New button to add a workgroup set (Figure 8).
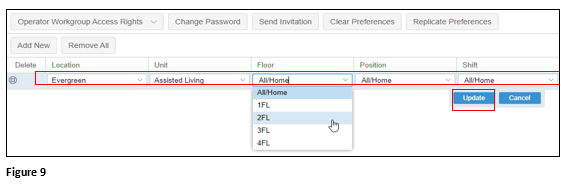
3. Click the drop-down list for each workgroup level and select the appropriate workgroup levels for the workgroup. Click the Update button to save your selections (Figure 9).
Operator Private Workgroup Definitions
Use the private workgroup definitions to create workgroup filters for the account. The private workgroup allows the user to filter the dashboard calendar view and group scheduling.
Adding an Operator Private Workgroup Definition
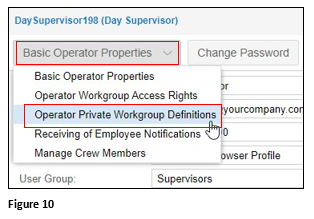
1. Click the Basic Operator Properties drop-down list and select Operator Private Workgroup Definitions (Figure 10).
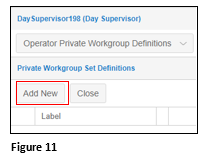
2. Click the Add New button (Figure 11).
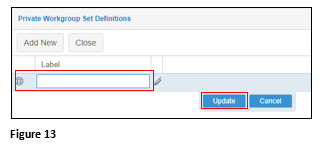
3. Click the default label name in the Label field of the Private Workgroup Set Definitions window and type a label name. Click the Update button to save the label name (Figure 12).
4. Select workgroup levels for the workgroup set and click the Update button to save your selections. Click OK to save your workgroup set (Figure 14).
