tmsConneXion App Users Guide
Summary
This document addresses work instructions on using the tmsConneXion Employee App.
tmsConneXion App:
Once the tmsConneXion app has been installed on the phone and pointed to the correct database, employees will be able to log in using their credentials.
tmsConneXion App Install
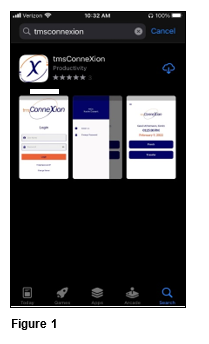
1. On the Android or IPhone use Google Chrome or Play Store.
2. Type in tmsconnexion.
3. Download the App (Figure 1).
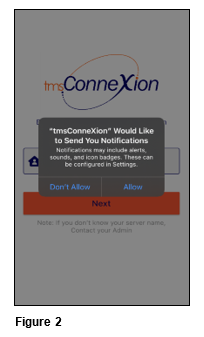
4. The employee may choose to allow or not allow notifications (Figure 2).
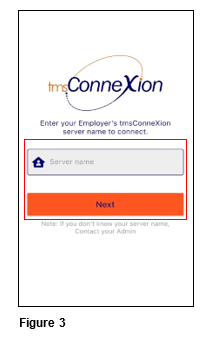
5. Once installed and opened for the first time, enter the Server Name as provided by TMS and tap Next (Figure 3).
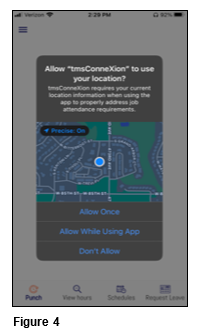
6. Upon first use, the employee will be prompted to Allow tmsConneXion to use your location; select Allow While Using App (Figure 4).
Punching In/Out
1. To punch both in and out, tap the Punch tile (Figure 5).

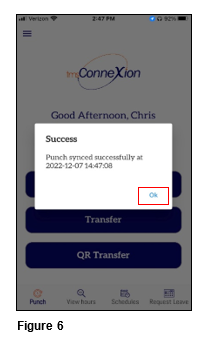
2. The employee will see a Punch Synced Successfully message once accepted. Tap OK (Figure 6).
Transfer
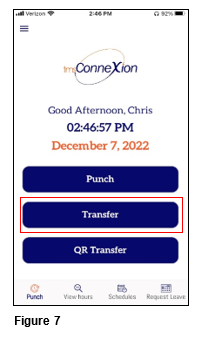
1. After punching in, tap Transfer on the homepage (Figure 7).
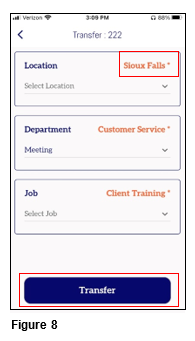
2. The employee’s home workgroup(s) will display in orange; use the drop down arrow next to each workgroup option to transfer and tap Save (Figure 8).
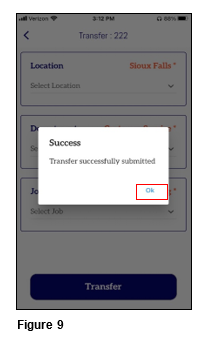
3. A Transfer Successfully Submitted message will appear. Tap Ok (Figure 9).
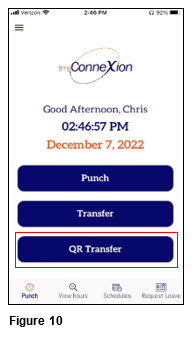
QR Transfer (Building)
Users may select QR Building Transfer if the organization utilizes the feature; the device camera will need to be enabled upon first use. Simply find the posted QR code and follow the instructions.
1. After punching in, tap QR Transfer on the homepage (Figure 10).
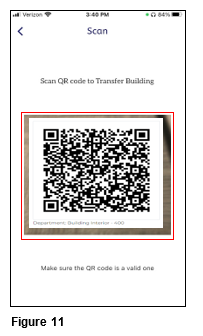
2. Scan the Transfer Building QR code (Figure 11).
2. Verify the transfer by tapping OK (Figure 12).

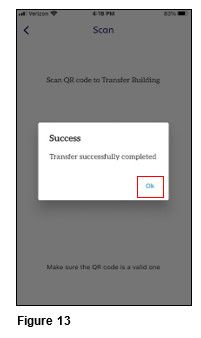
3. A Transfer Successfully Completed message will display, tap OK (Figure 13).
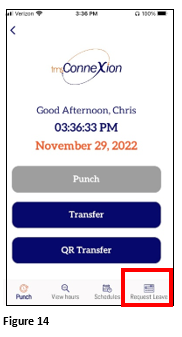
Requesting Time Off
1. Tap Request Leave (Figure 14).
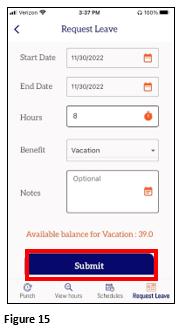
2. Fill in the Start/End Dates, the number of Hours requested, the Benefit to be used and any optional Notes. Tap Submit (Figure 15).
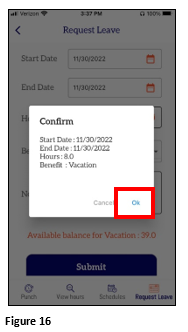
3. On the Confirmation box, tap OK to send the request (Figure 16).
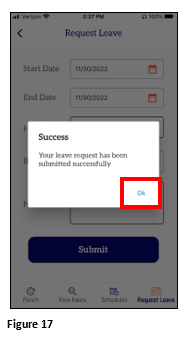
4. Tap Ok to clear the Success box (Figure 17).
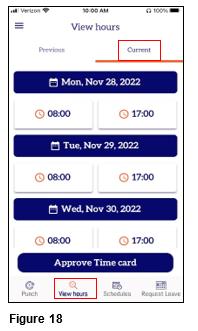
Time Card Review
Users may see their punch times for each day for both the Current and Previous Periods.
1. To review punches, tap View Hours. The Current Period punches will display; to see the last periods punches, tap Previous (Figure 18)..
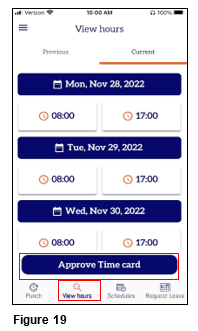
Time Card Approval
1. When the user’s timecard is ready to be approved, tap View Hours and Approve Time Card (Figure 19).
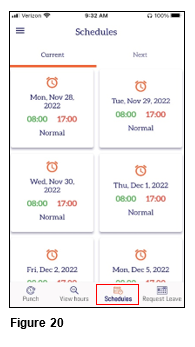
Schedules
1. If the organization utilizes work schedules, users may view both the Current and the Next pay period schedules by tapping Schedules (Figure 20).