tms100 Setup Guide
Summary
This document outlines the process to set up the tms100 time clock.
tms100 Setup
Device Setup
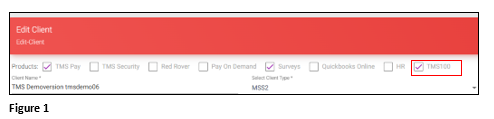
1. From the Admin tool, check the tms100 box (Figure 1).
2. Setup the Admin password on the clock.
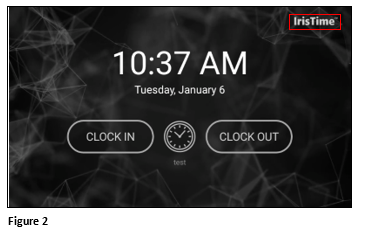
a. Turn on the clock
b. Tap the IrisTime logo on the clock (Figure 2).
c. Setup the Admin Password and confirm.
*The Password requirements:
1. A minimum length of 8 characters and at least
2. 1 upper case letter
3. 1 lower case letter
4. 1 special character
5. 1 number
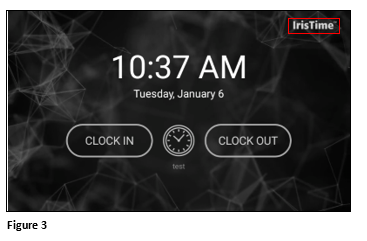
d. Tap the IrisTime Logo (Figure 3).
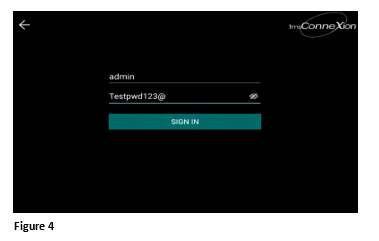
e. Login as Admin with password (Figure 4).
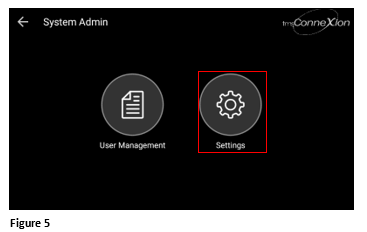
3. Tap Settings (Figure 5).
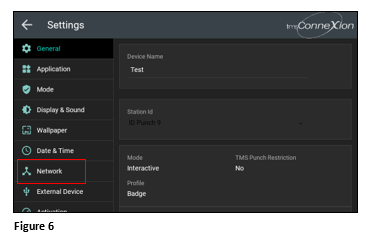
4. Tap Network (Figure 6).
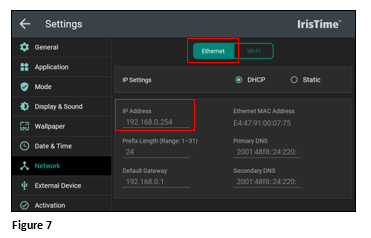
a. If Ethernet, verify that an IP address has populated and move to the next step (Figure 7).
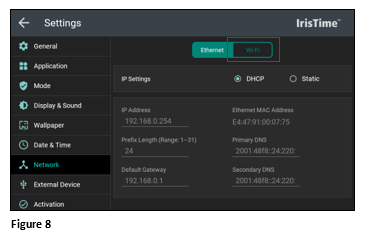
b. If setting up wireless, tap WiFi (Figure 8).
c. Select the appropriate WiFi network and the password. Tap Connect.
d. The clock will state ‘Connected’ under the WiFi network if entered correctly.
c. Tap Back.
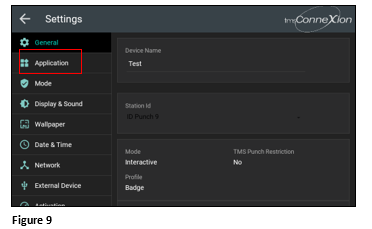
5. Tap Application from the menu list (Figure 9).
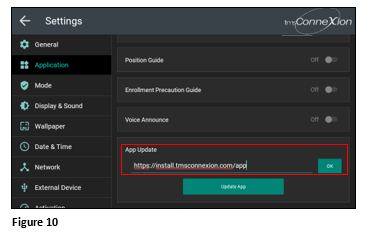
a. In the App Update field, enter https://install.tmsconnexion.com/app and tap OK (Figure 10).
b. Leave both the ID and Password blank. Tap OK (Figure 11).
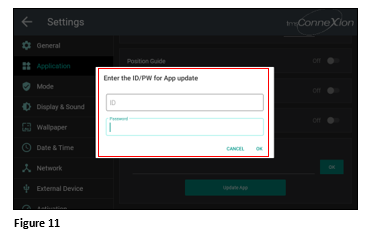
c. The clock will restart and the App will be installed.
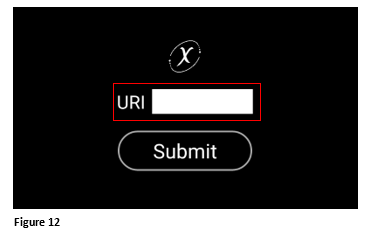
6. Enter the Company URI and tap Submit (Figure 12).
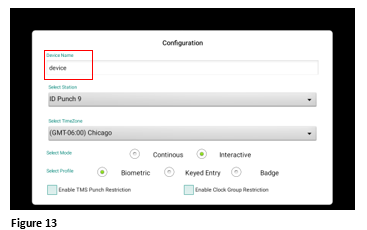
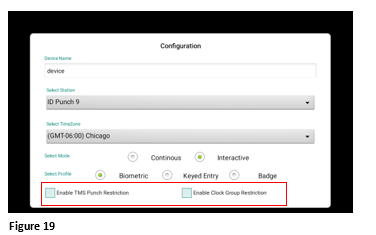
a. Enter the Device Name (per the client) (Figure 13).
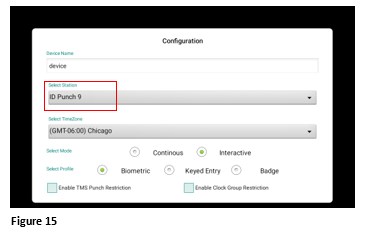
b. Select the Station ID from the dropdown (these are the options from AOD) (Figure 15).
c. Select the TimeZone (Figure 16).

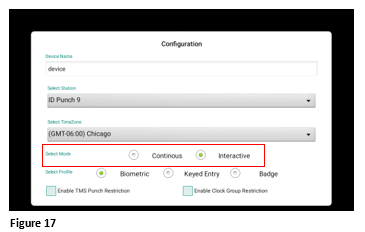
d. Select the Mode (Figure 17).
i. For Punch only, Continuous will show Time Only and will recognize as employee walks up.
ii. Interactive will show Punch/Transfer/Review and always on. Employee will select the option.
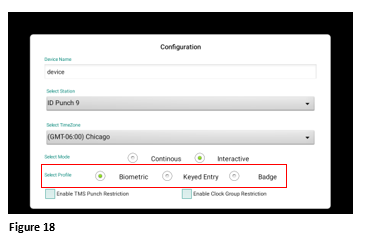
e. Select Profile (Figure 18).
i. Biometric
ii. Badge
iii. Keyed Entry
f. If Punch Restrictions are used (if not, leave blank) (Figure 19):
i. Check Enable Punch Restrictions check box
ii. Once device is registered, go into AOD and make necessary changes to all ESS profiles that the client may use.
a. Tap Save.
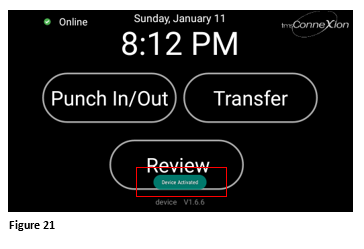
b. Look for the Device Registered Successfully message (Figure 20).

i. Look for the Device Activated Successfully message (Figure 21).
Enroller For Keyed Entry
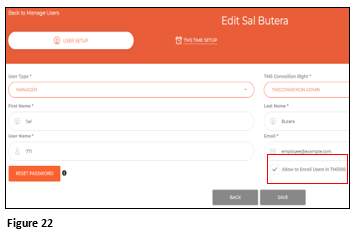
1. Verify the Enroll Users in tm100 box is checked in tmsConneXion (Figure 22).
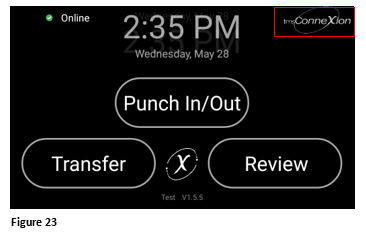
2. From Clock home screen, tap the tmsConneXion logo (Figure 23).
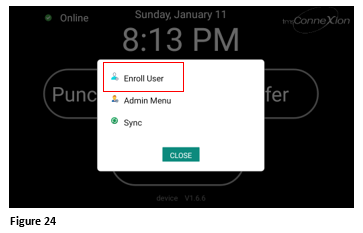
3. Tap Enroll User (Figure 24).
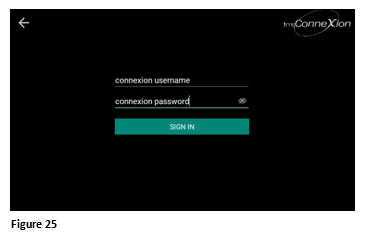
4. The Enroller will enter their tmsConneXion ID and Password. Click Sign In (Figure 25).
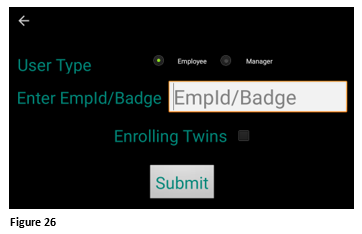
5. Enter the EmpID/Badge for who’s being registered and click Submit (Figure 26).
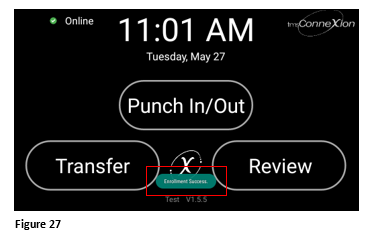
6. Enrollment Successful message should display, if not, repeat process (Figure 27).
Enroller For Biometric Entry
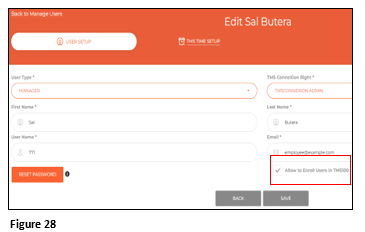
1. Verify the Enroll Users in tm100 box is checked in tmsConneXion (Figure 28).
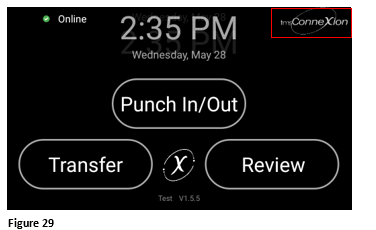
2. From Clock home screen, tap the tmsConneXion logo (Figure 29).
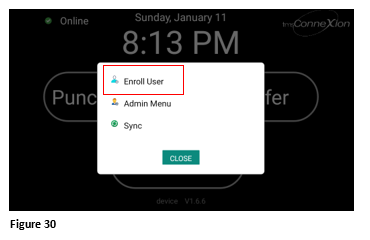
3. Tap Enroll User (Figure 30).
4. The Enroller will enter their tmsConneXion ID and Password. Click Sign In (Figure 31).

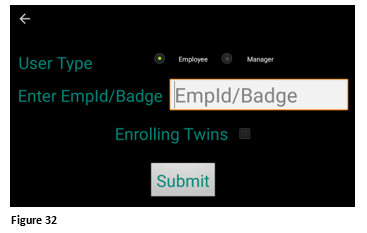
5. Enter the EmpID/Badge for who’s being registered and click Submit (Figure 32).
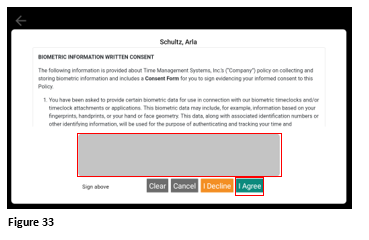
6. Employee will sign the biometric waiver and tap Accept. If the employee declines they cannot use the clock (Figure 33).
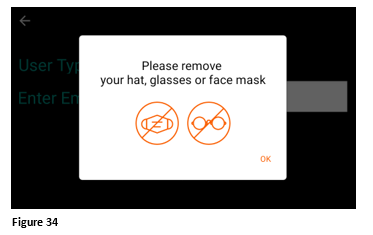
7. Follow message on tms100 screen including removing eye glasses, hat and masks (Figure 34).
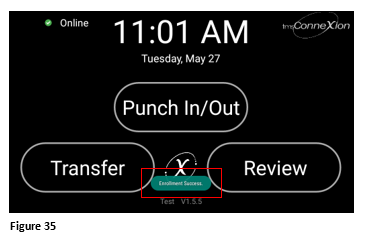
8. Enrollment Successful message should display, if not, repeat process (Figure 35).
Enroller For Badge Entry
1. Verify the Enroll Users in tm100 box is checked in tmsConneXion (Figure 36).

2. From Clock home screen, tap the tmsConneXion logo (Figure 37).
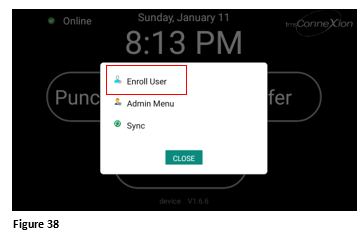
3. Tap Enroll User (Figure 38).
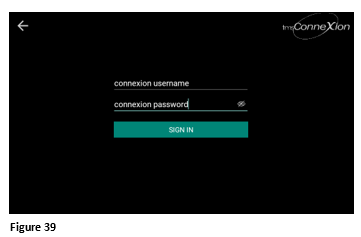
4. The Enroller will enter their tmsConneXion ID and Password. Click Sign In (Figure 39).
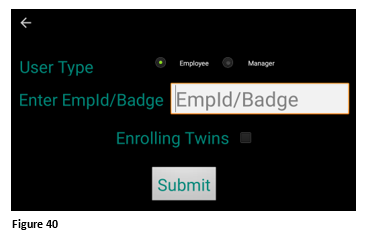
5. Enter the EmpID/Badge for who’s being registered and click Submit (Figure 40).
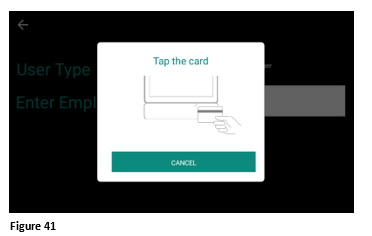
6. Employee will present the badge to the badge reader (Figure 41).
7. Enrollment Successful message should display, if not, repeat process (Figure 42).
