How to Request Time Off in MyAttendanceManager Mobile (MAM Mobile)
Summary
This document addresses work instructions on how employees can request partial, single and multiple days off in MyAttendanceManager Mobile (MAM Mobile).
Requesting Time Off in MAM Mobile
1. Log into MyAttendance Manager Mobile.
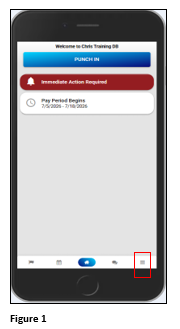
2. From the Home page, tap the Hamburger Menu in the lower right corner (Figure 1).
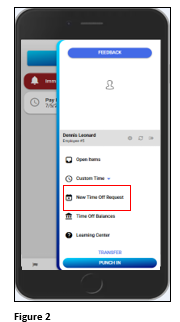
3. Tap New Time Off Request (Figure 2).
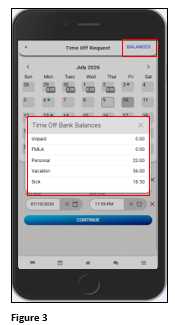
4. Benefit Balances may be reviewed before starting the request by tapping Balances (Figure 3).
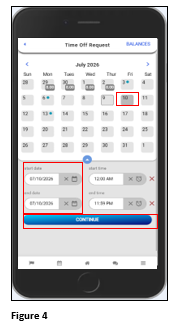
5. Tap the day on the Calendar; if the user has schedules assigned, they will also show on the calendar day. The Start Date and End Date will populate with the day requested which will be used for a partial day or single day request. if the request is more than a day, click the last day of the planned absence and the End Date will display it. The Start Time and End Time, despite displaying, will not be used. Click Continue (Figure 4).
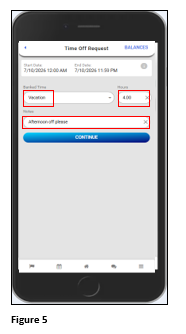
6. Select the appropriate Banked Time bucket, the number of hours requested and any notes (optional). Tap Continue (Figure 5).
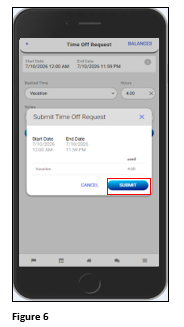
7. Verify the request information is correct and tap Submit (Figure 6).
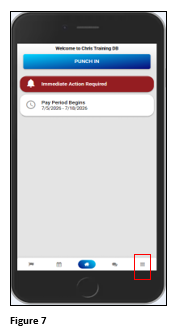
8. To view any pending, but not yet approved leave requests, tap the Hamburger Menu (Figure 7).
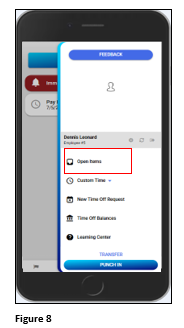
9. Tap Open Items (Figure 8).
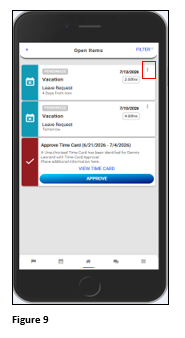
10. The Pending Leave Request(s) will be displayed until it has either been approved or denied. The User may withdraw the pending request by clicking on the three dots (Figure 9).
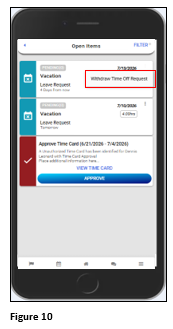
11. Tap Withdraw Leave Request (Figure 10).
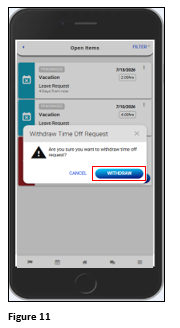
12. Tap Withdraw and the pending request is canceled (Figure 11).
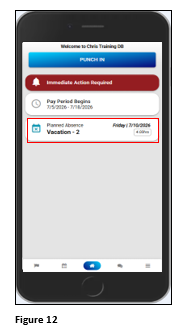
13. Once the request has been either approved or denied, the user may receive an email notification. If approved, the planned time off absence will be placed on the app homepage (if during the current pay period) (Figure 12).
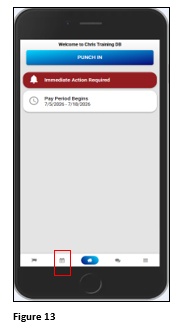
14. The approved leave will also be placed on the Calendar. Tap the Calendar icon (Figure 13).
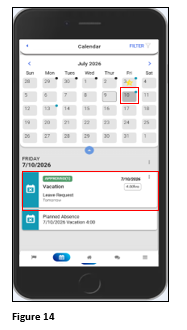
15. The approved leave will display on the Calendar in the form of a blue dot. Tap the Calendar day to view the details (Figure 14).
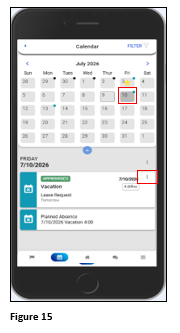
16. Once a leave request has been approved, the user may not cancel it. If the planned absence is no longer needed, some organizations will allow the employee to submit a request to their manager for cancelation in the app. Tap the absence blue dot on the calendar and on the Approved banner, click the 3 dots (Figure 15).
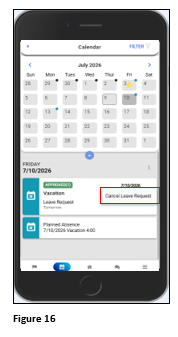
17. Tap Cancel Leave Request (Figure 16).
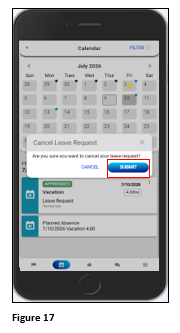
18. Tap Submit to send the cancelation request to the manager (Figure 17).