How to Use tmsKiosk
Summary
This document outlines how to use tmsKiosk and each feature as they have been configured.
tmsKiosk is a quick way for employees to punch, transfer work groups, review timecards and request time off. This document will demonstrate how these features work. Please note, there may be features explained that your organization may not utilize.
How to Punch In and Out
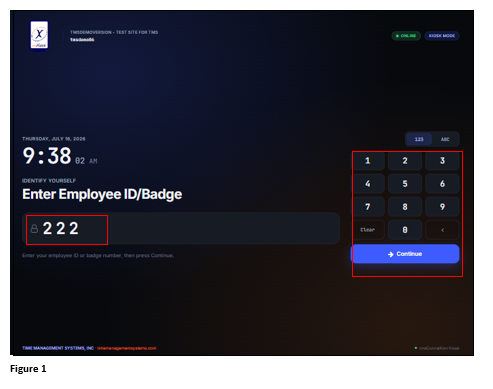
1. Enter the Employee ID/Badge using the keypad and tap Continue (Figure 1). Please note, the user’s ID/Badge may be displayed with ***** depending on the organization’s settings.
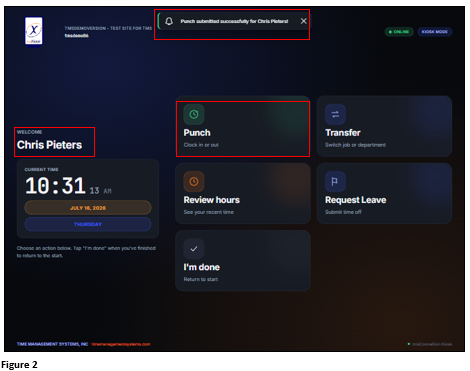
2. The Action screen will display with the employee’s name. Tap Punch and if successful, a message will display at the top. If the punch fails, a message stating that will display instead (Figure 2). Reasons for failure could be a duplicate punch or punch restrictions.
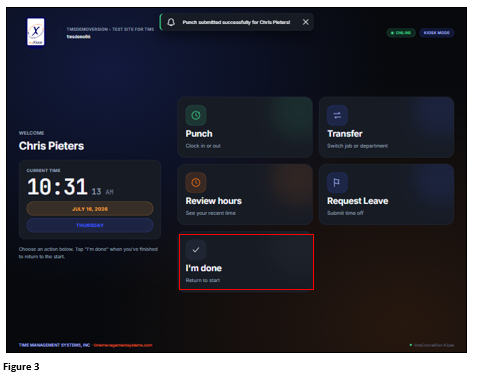
3. Tap I’m Done to exit. The Action screen will time out at 20 seconds if no other functions are selected (Figure 3).
How to Transfer
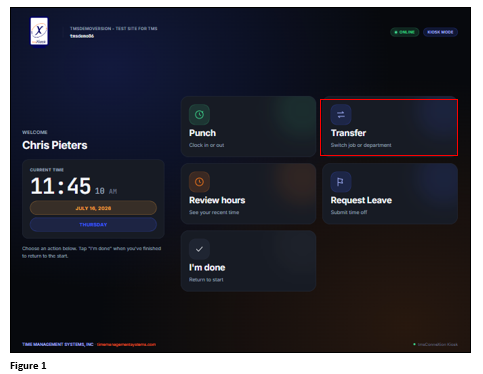
1. To temporarily Transfer from one workgroup to another, from the Action screen and after punching in, tap Transfer (Figure 1).
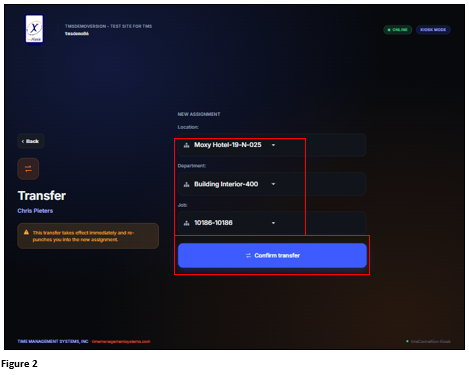
2. From the Transfer screen, use the workgroup dropdown arrows to select the appropriate temporary workgroups. The number of workgroups available may vary. Tap Confirm Transfer (Figure 2).
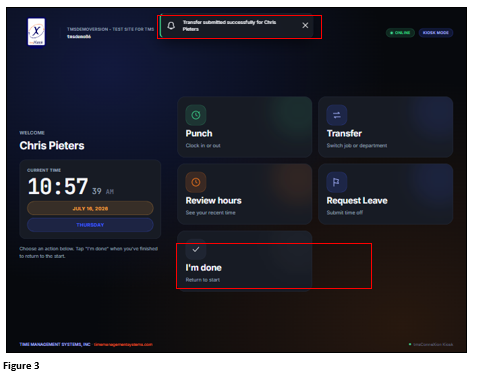
3. Upon a successful Transfer, the User will be taken back to the Action screen where a Successful Transfer message will display. Tap I’m Done to exit (Figure 3).
How to Review Hours
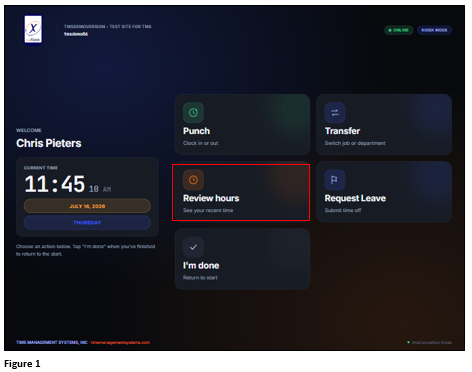
1. To Review the Current and Previous period timecards, from the Action screen, tap Review Hours (Figure 1).
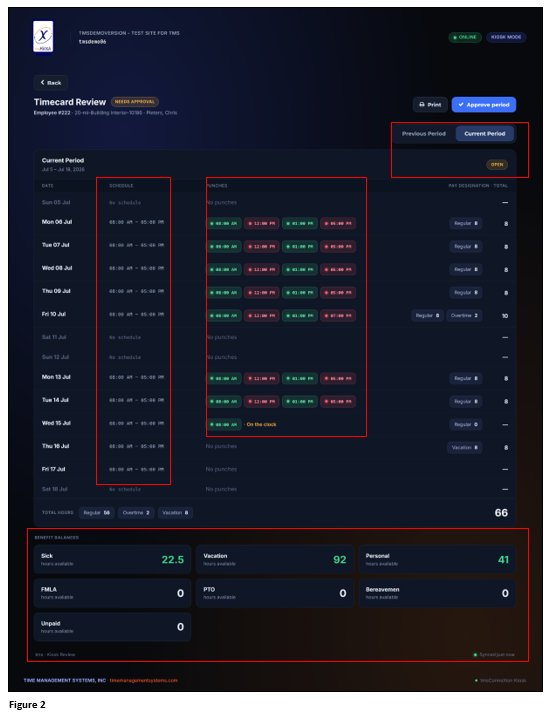
2. Information such as schedules, punches and hours for both Previous and Current Pay Periods can be reviewed and printed as needed. Benefit balances will also be displayed if applicable (Figure 2).
How to Request Time Off
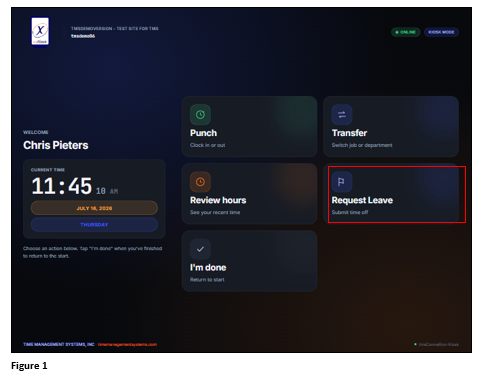
1. To Request Time Off, from the Action screen, tap Request Leave (Figure 1).
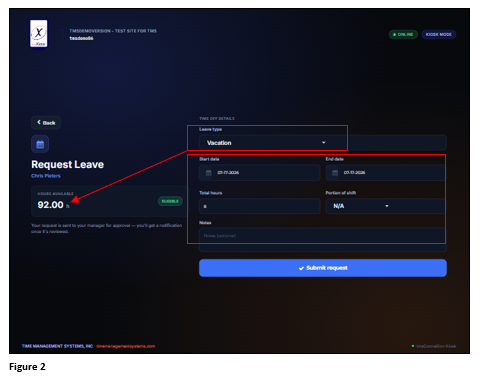
2. The Request Leave box will open. Select the Leave Type and once selected the available balance will display. If requesting a partial or single day off, the Start and End dates will be the same; if requesting multiple days off, change the end date appropriately. Enter the Total Hours requested, and if requesting a partial day, add that information to the Notes. If the user has an assigned schedule, then Portion of Shift may also be selected. Tap Submit Request to send (Figure 2).
How to Approve a Timecard
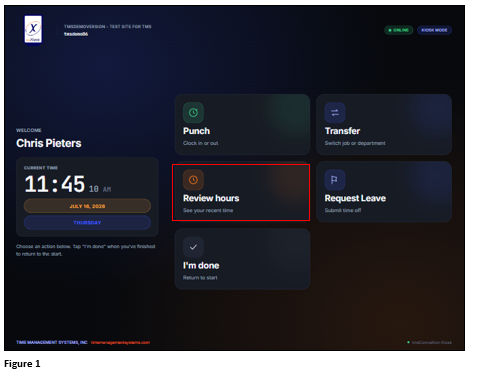
1. Users may be asked to approve their timecard at the end of the pay period. To approve the timecard, tap Review Hours (Figure 1).
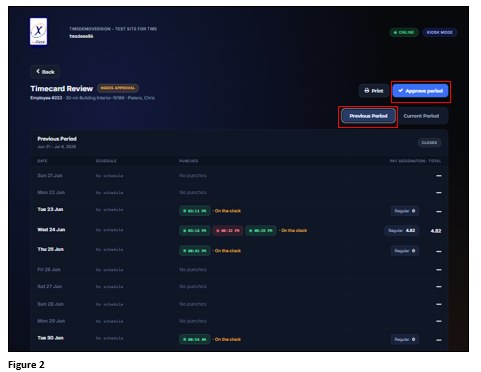
2. Tap Previous Period and when ready, tap Approve Period (Figure 2).
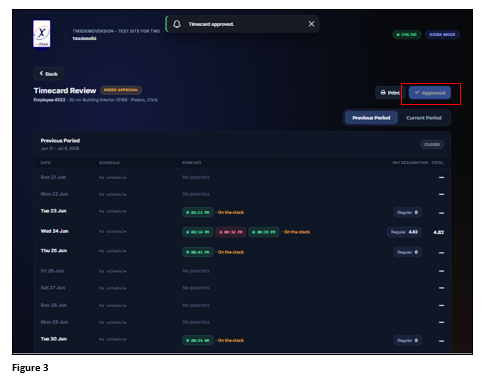
3. Once approved, the Approve Period button will grey out and will be unavailable until the next previous period (Figure 3).