Setting Up Holidays
Summary:
This document describes how to set up holidays in Manager Portal.
Holiday Setup
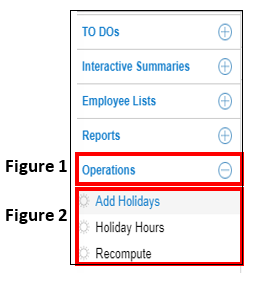
1. From the Manager Portal Menu, select Operations (Figure 1) and the holiday options will display (Figure 2).
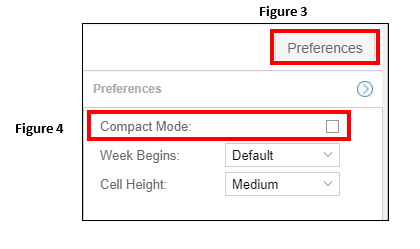
2. The first time you set up holidays, click on the Preferences button (Figure 3) and remove the checkmark from Compact Mode (Figure 4). This will only need to be done by the user the initial time as long as the preferences are not reset.
3. Click on Add Holidays to set up your yearly holidays and current month calendar will appear.
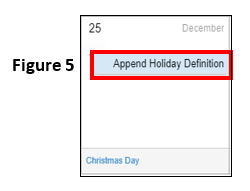
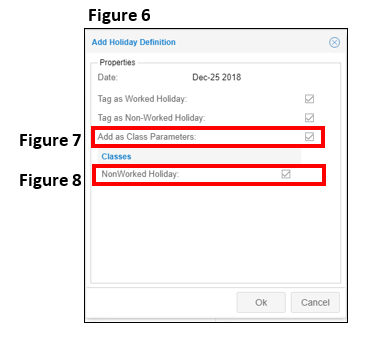
4. Find the date of the holiday on the calendar (in this example, we have chosen Christmas day) and click on the ‘+’. Select Enable as Holiday (Figure 5) and the date will display a check mark (Figure 6) . Note: The calendar automatically labels the specific day with the name of the holiday (i.e. Christmas Day).
5. The Add Holiday Definition box (Figure 6) will open; check the box next to Add Class Parameters (Figure 7) and verify Non-Worked Holiday under Classes is checked (Figure 8). Click OK to finish.
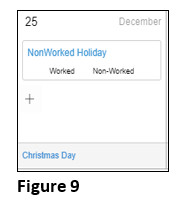
6. The cell will display the following (Figure 9).
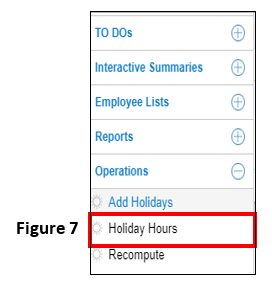
7. To view your list of employees and the amount of holiday hours they will be paid for on each defined holiday, select Holiday Hours from the Operations menu item (Figure 7).
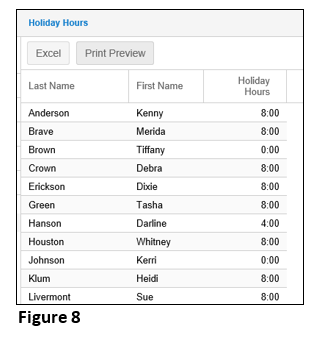
8. Upon clicking on Holiday Hours, your employees and their holiday hours will display (Figure 8); these were imported when the employee mass import was completed.
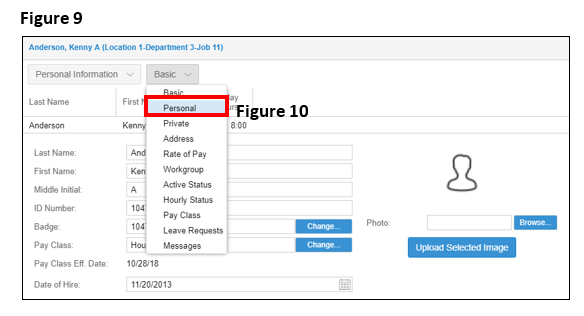
9. To adjust an employee’s holiday amount, click on their name and their Personal Information page will display (Figure 9). Change the view from Basic to Personal (Figure 10).
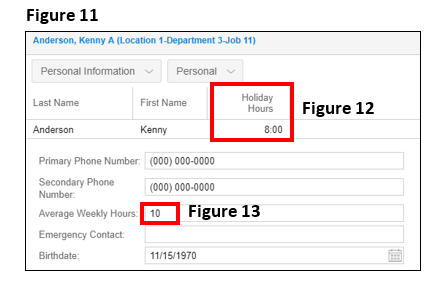
10. The Personal page will display (Figure 11), with the current Holiday Hours displayed (Figure 12). To change, type in the new holiday hours to be paid in the In the Average Weekly Hours field (Figure 13) and either hit enter or click on a different field to save the change.
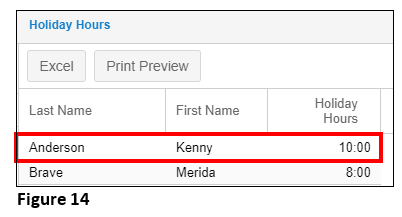
11. Click Holiday Hours from the Operations menu and you can verify the employee’s hours change (Figure 14).
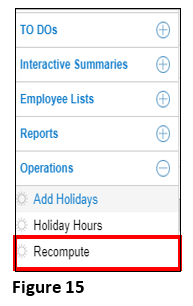
12. Once you have added all of the company holidays and have verified/changed the employee hours to be paid, a recompute will need to be performed. A recompute forces the software to update and apply the changes. From the Operations menu, select Recompute (Figure 15).
13. The Recompute screen will open (Figure 16); select Recompute All Employees (Figure 17) to apply the changes.
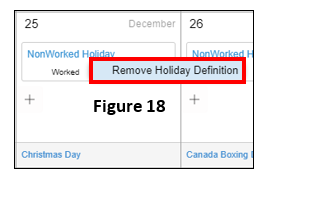
14. To remove a holiday, click on NonWorked Holiday in the cell and Remove Holiday Definition (Figure 18).
