Managing Time Off Requests
Summary
This document addresses work instructions on how to manage leave requests.
Managers may have multiple ways to see leave requests depending on how your company chose to set up alerts. In this video, we are going to look at calendar dashboard alerts. Please keep in mind that your setup may look different.
Viewing Leave Requests
To Access Pending Leave Requests From the Calendar Dashboard
1. Select Daily Operations (Figure 1)
2. Select Dashboard (Figure 2).
3. The calendar will show the current pay period, which can be changed via the dropdown arrow next to Periods (Figure 3).
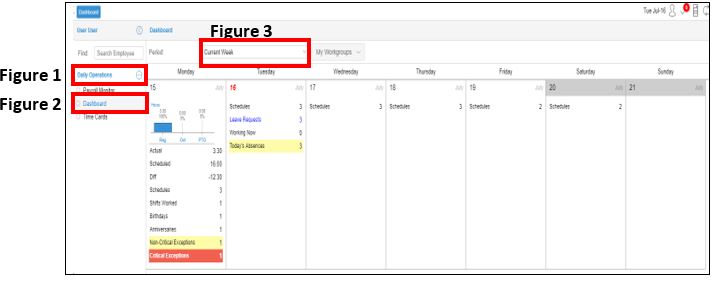
4. To view requests made on a specific day, click on Leave Requests, which are in blue (Figure 4).
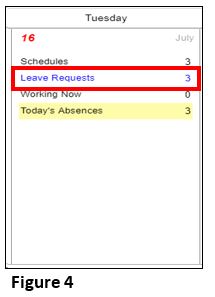
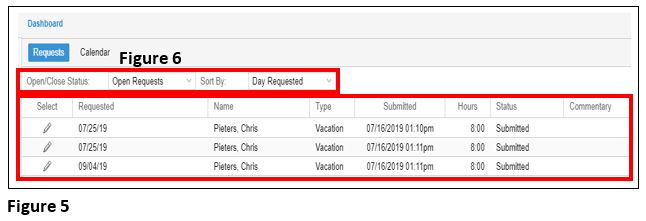
Once Leave Request has been selected, you will be taken to that specific days Pending Leave Request(s) (Figure 5). The page is designed to assist supervisors to grant leave requests logically and fairly with the default view of Day Requested. This view can be changed by clicking the dropdown arrow next to Sort By (Figure 6) where there are options for Date of Hire, Date of Full Time and Date Submitted. Historical requests can also be viewed by changing the Open/Closed Status.
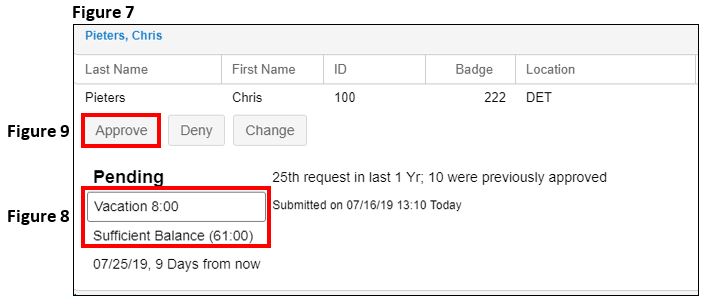
5. Click on the pencil icon next to the request you wish to review and the Leave Request review box will open (Figure 7). The employee’s benefit and benefit balance (if used) will be available for reference (Figure 8) to help assist the supervisor in their decision making.
Approving a Leave Request
1. Click on the Approve button (Figure 9) and the Confirm Approval of Employee's Leave Request confirmation box will open up (Figure 10).
On the approval confirmation box, the supervisor may add notes (Figure 11) and if email is set up and used, they may also send email confirmation of the approval (Figure 12). The employee will see the approval in their Benefit tab as well. Click OK to complete the approval and the request will now show Approved.

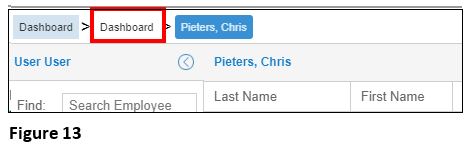
2. Select Dashboard in the Breadcrumb (Figure 13) menu to view the remaining requests.
Denying Leave Requests
A supervisor may wish to deny a leave request.
1. Select the pencil icon next to the request you wish to review and the Leave Request review box will open.
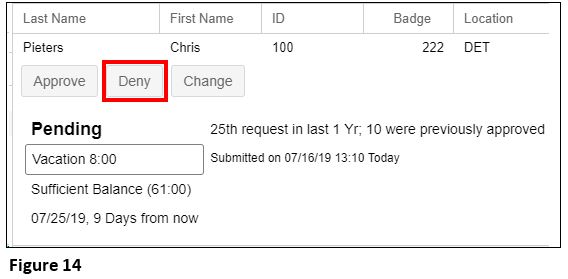
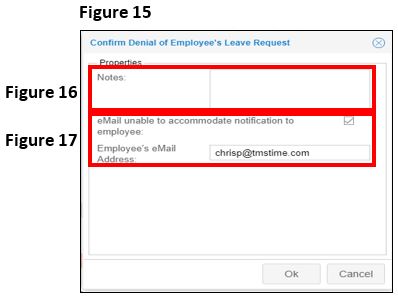
2. Click on the Deny button (Figure 14) and a confirmation box will open up (Figure 15).
On the denial confirmation box, the supervisor may add notes (Figure 16) and if email is set up and used, an email confirmation of the approval can also be sent (Figure 17). The employee will see the denial in their Benefit tab as well. Click OK to complete the denial and the request will now show Denied. Select Return to List to address other leave requests.
Changing a Leave Request
A supervisor may wish to change a leave request, which is most typically done when the employee doesn’t have enough of a balance to meet the request total.
1. Select the pencil next to the leave request you wish to review.
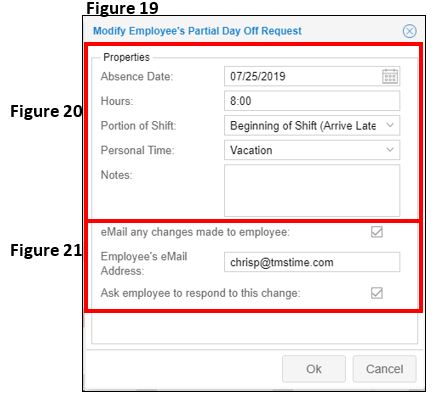
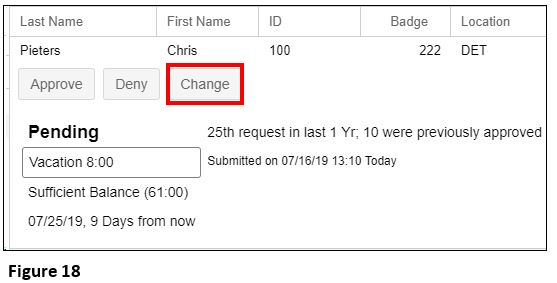
2. Select the Click button (Figure 18) and a confirmation box will open up (Figure 19).
On the modify confirmation box, the supervisor may:
a) change the date of the request, the hours requested, the portion of the shift, and personal time (Figure 20).
b) If email is set up and used, the supervisor may also send email confirmation of the change and ask the employee to respond to the change (Figure 21). The employee will see the denial in their Benefit tab as well.
c) Click OK to complete the change and the request will continue to show open until the employee either cancels the request or they accept the change.